Thursday, May 30, 2019

Jane Davenport’s New Artomology Collection

Hello, crafty friends! Today I have something other then a card to share here on my blog (but it is stamping related), not many people know that I actually do drawing, painting and art journaling, I’ve shared a few drawings on Instagram but never anything here on my blog (I’m a chicken). Well one of my favorite artist, Jane Davenport, is having a release of her new Artomology Collection through Spellbinders and the products are incredible. I wanted to create something to show how fun these new products are and to show a few ways to use them.
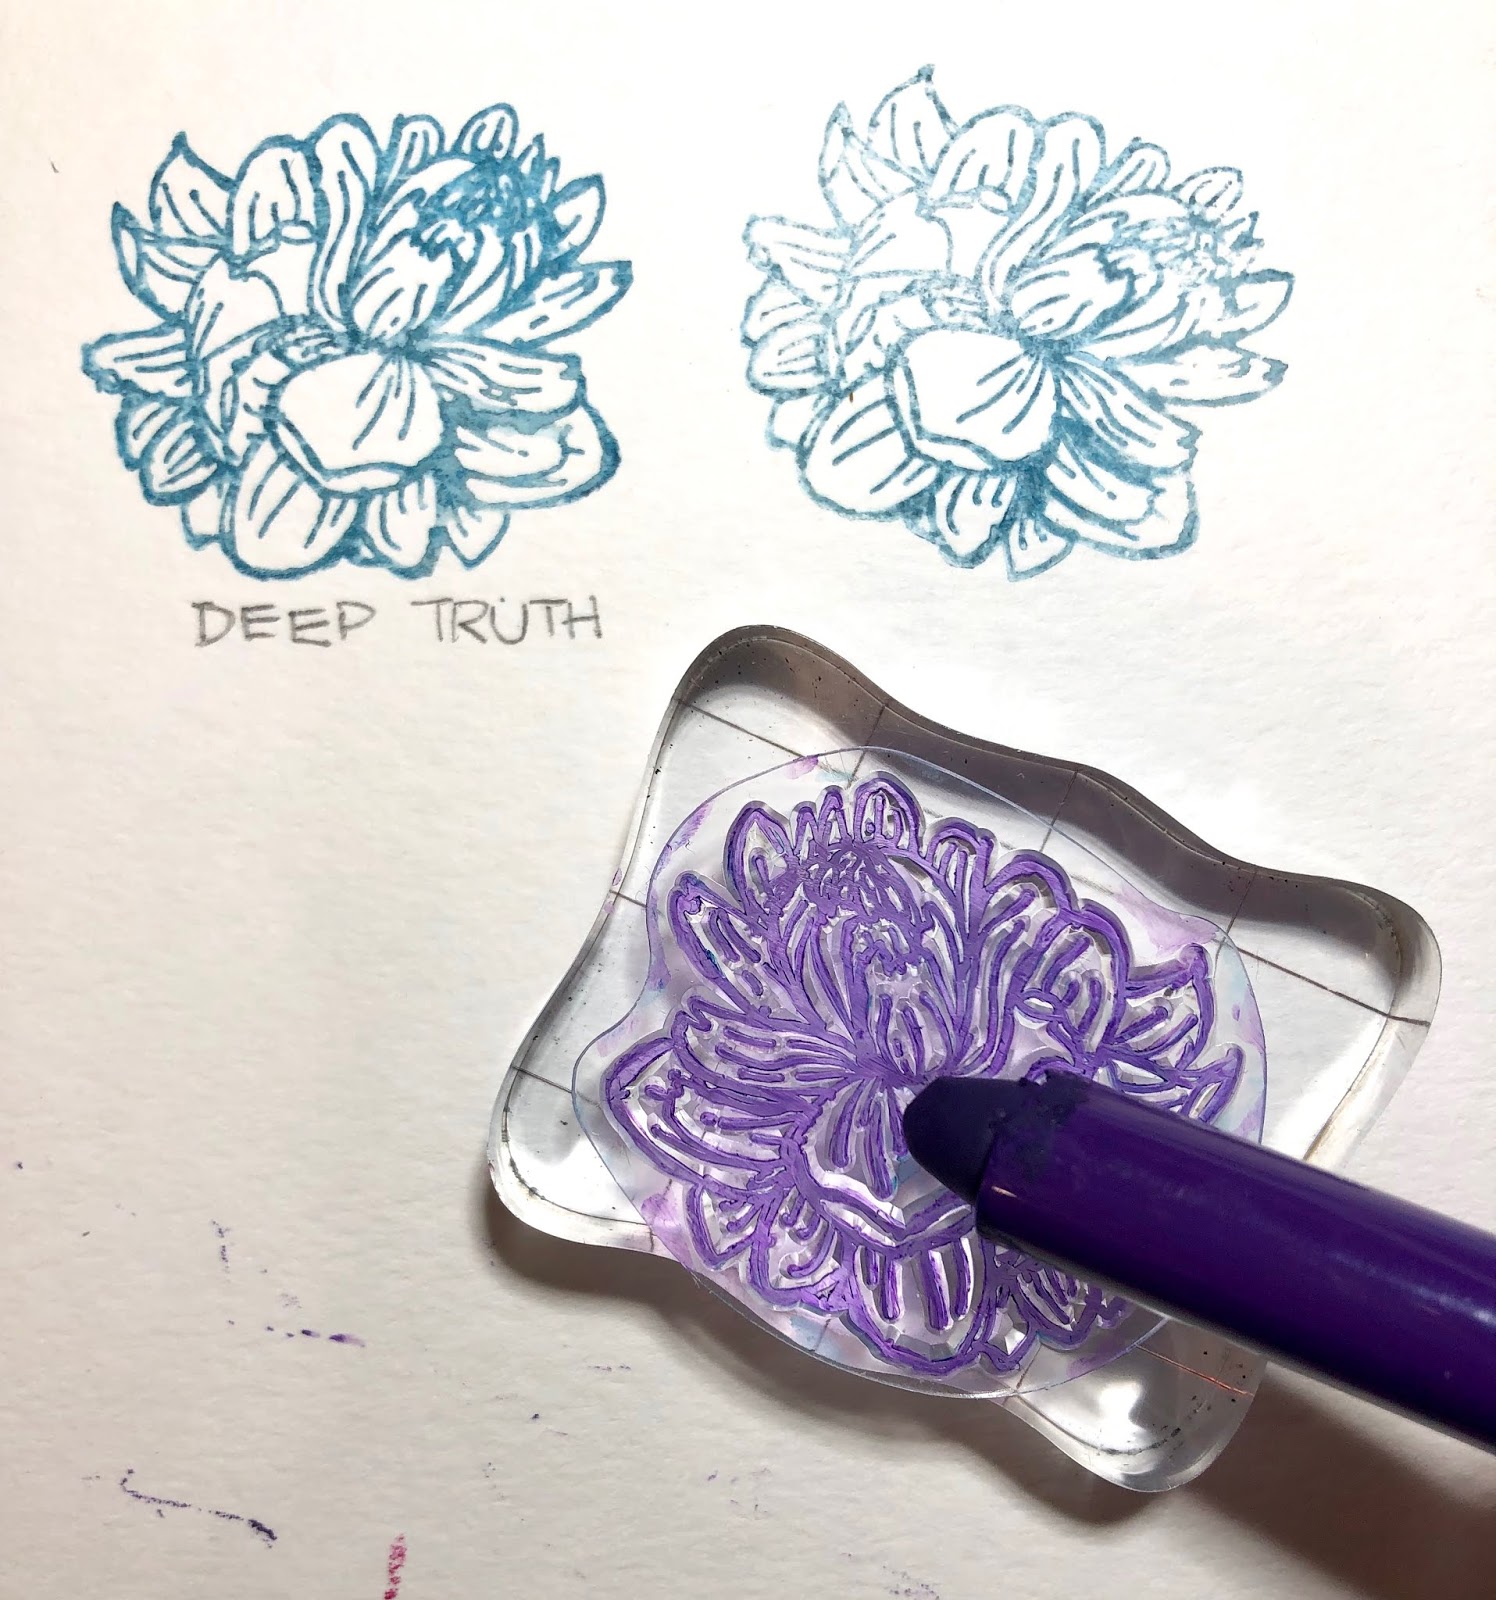
I used a few of the new Jane Davenport Artomology products to create an art journaling page but everything I used could easily be used in the same way to create a card, which I’ll show you in another blog post. I wanted my art journaling page to show how versatile the new Colorsticks are, how creamy, rich and vibrant the colors are and how you can used them directly on your page, or how you can watercolor with them or apply the Colorstick directly onto your stamp and stamp with them. Below you can see how I colored directly on the flower stamp with a Colorstick, then misted it with a spray bottle and stamped it not just once but twice and it still came out nice.
The first thing I did to create my art journaling page was to use the new stamp set Colour is Happiness. I used the image of the girl and stamped her twice in black ink, tilting the stamp a bit on the second girl. Once I had my girls stamped, I decided on my color palette and swatched five of the blue hued Colorsticks along the left edge of my page coloring directly on the page with each stick and then applying some water. Next I focused on adding some color to each of the girls faces by using Jane’s Birthday Suit Palette Pastels and applied them using some Baton BlendersI added some Baby Blues and Limpid Pool Colorstick for the eyes and some Make a Moue for the lips. After that, instead of having my girls just floating on the page I wanted to ground them, so I took a few of the Colorsticks and scribbled the colors onto a scrap piece paper then using a paintbrush added water to the Colorsticks and watercolored a square around my stamped images. Once my background was dry, I stamped three of the flower image that came in the Colour is Happiness stamp set. You can apply the Colorstick directly onto the clear stamp then spray it lightly with water and stamp it onto your page. To add texture to my background I used the Colorsticks to draw lines, dots, dashes and swirls then blended them with my watercolor brush. I stamped the Colour is Happiness along the left corner and enhanced the stamped images and hair using an Ultimate Waterproof Black Lace pen. This was so fun to create!
Thanks so much for stopping by!
Don't forget, you can follow me on InstagramTwitter and Pinterest to see what I'm up to.

Wednesday, May 29, 2019

Fairy Garden Shaker Card - CTD545

 Hello, hello! Thanks for popping in! I hope your week is going well. Today is Wednesday and it’s time for a new Color Throwdown Challenge. I love this week’s colors which are raspberry, lavender, green and kraft. I hope you’re able to play along this week.
 The card that I created for this week’s CTD challenge is a shaker card using the Hello Bluebird stamp set Fairy Garden along with the Fairy Garden dies. I can’t seem to get enough of this sweet stamp set. To create my card, I started out by blending on some spun sugar distress oxide ink in the center of my white card base and then added some picked raspberry and seedless preserves distress oxide ink blending from the center out from light to dark. Next I cut a piece of white card stock to the size of my card front and die cut an oval in the center using an oval die. After die cutting my oval, I used some wilted violet distress oxide ink and blended from the outer edges in toward my die cut oval. Once both of my ink blended pieces were completed, I used a paintbrush to splatter on some drops of water and lifted them with paper towel then added splatters of white craft paint. Next I stamped my images and colored them using Copic markers then die cut them out. I heat embossed my sentiment with white embossing powder onto a strip of black card stock. I also die cut a piece of simply chartreuse card stock using the Grassy Hillside Borders die and blended on some lucky clover distress oxide ink.
To create the shaker part of my card, I added a piece of acetate to the back side of my die cut oval piece and then added foam tape all around the opening and the corners. I filled the oval with purple, lavender and pink sequins along with some clear and pink Pastel Diamond Toppings then adhered my card base sealing the shaker bits inside. As a finishing touch, I added some clear Wink of Stella glitter pen on the butterfly, fairy and wand.
For more inspiration, check out the design teams blog links below or you can go to the Color Throwdown blog for details on how to play along and see all of the sample entries in one location.
Amy Rohl
Amy Rysavy
Wanda Cullen
 
Cécile Ribon - May Guest Designer

Thanks so much for stopping by!
Don't forget, you can follow me on InstagramTwitter and Pinterest to see what I'm up to.

Friday, May 24, 2019

Rainbow in a Jar Card Collection

Hello there! I’m popping in today to share a collection of cards that I created using the Queen & Company Love Jar Kit. For these cards, I started out using the basics from the Love Jar Kit and added some other fun Queen & Company supplies for a whole new look.
The first thing I did once I knew I wanted to make a some cards using rainbow colors was to die cut a bunch of the stems and flowers using the Love Jar Flowers & Stems dies. Once I had all of my die cut pieces, I began stamping my stems in new leaf ink and my flowers in real red, canyon clay, daffodil, marine mist and lovely lilac. For each card I used paper from the Dots Paper Pad which was perfect because it has all the colors in the rainbow in small and large dots. I used the Outside In Stitched Rectangle for either my background piece or for a panel on my cards. For my first card, I used the heart tag and stamped a red heart in the center and then the sentiment stamp made with love. I filled the shaker with more red hearts, some clear and blue Pastel Diamond Toppings and some of the sweet yellow flowers that come in the kit.
For my second card, I wanted to do a horizontal card with the look of flowers spilling out of the jar. I stamped the hello heart and adhered it onto a stitch rectangle tag and tied it to the jar with some gray and white bakers twine. For all of my cards I used foam tape to pop some of the flowers and then added some fun yellow Goosebumps along with some rhinestones from the kit.
I know I wrote this before on previous post for cards that I created using Queen & Company supplies but my favorite part of making these shakers is getting to fill the shakers and jazz up the flowers with all of the fun gems, fillers and bling.
Thanks so much for stopping by!

Don't forget, you can follow me on InstagramTwitter and Pinterest to see what I'm up to.

Wednesday, May 22, 2019

I Sea it’s your Birthday - CTD544

 Hello! It’s time for this week’s Color Throwdown Challenge where we have the colors red, aqua and dark blue.
For my card, I used the new Lawn Fawn stamp set Seahorsin’ Around along with the coordinating Seahorsin’ Around dies to create a birthday card. To create my card, I started out with a square card base and then added a piece of red Really Rainbow paper. Next I die cut a circle using the Outside in Stitched Circle Stackables die and some Pacific point card stock and blended on some pacific point ink along the bottom. After that, I used the same circle die and die cut a piece of kraft card stock then die cut it again using the Stitched Hillside Borders die to create a sandy bottom. Once that was done, I blended on some vintage photo distress oxide ink along the edges of my kraft pieces and adhered it to my blue circle. Next I stamped all of my images and colored them using Copic markers then die cut them out. For the mermaid, rock and small seashell, I used the Mermaid for You set along with the coordinating dies and for the party hats, cake and horn I used the Party Animal set with coordinating dies. The balloons were from the Bicycle Built for You set along with the dies. I stamped my sentiment onto a banner I had die cut using the Everyday Sentiment Banners die.
For more inspiration, check out the design teams blog links below or you can go to the Color Throwdown blog for details on how to play along and see all of the sample entries in one location.
Amy Rohl
Amy Rysavy
Wanda Cullen
 
Cécile Ribon - May Guest Designer

Thanks so much for stopping by!
Don't forget, you can follow me on InstagramTwitter and Pinterest to see what I'm up to.