Showing posts with label Anniversary. Show all posts

Wednesday, August 30, 2023

Hollyhocks Anniversary - CTD758

Hi there! I’m hostess over at the Color Throwdown Challenge for this week and I chose the colors pink, green, magenta and white for us to create with. I can’t wait to see what you create using these colors!
For my card I used The Greetery’s Hollyhock BotaniCuts dies to create an anniversary card. I started out by die cutting the leaves in mellow moss and the flowers in white, pink pirouette and raspberry fizz card stock and then using peeled paint, scattered straw and spun sugar distress oxide ink along with some Altenew razzleberry and Pinkalicious ink to blend on each die cut piece. I also blended some spun sugar distress ink on the background of my white card base. I used the Papertrey Ink stamp set, Think Big Favorites for my sentiment which I stamped onto a strip of raspberry fizz card stock for along the bottom of my card. As a finishing touch, in the center of each flower I added some yellow Stickles glitter.
For more inspiration, check out the design teams blog links below or you can go to the Color Throwdown blog for details on how to play along and see all of the sample entries in one location.

Amy Rohl
Amy Rysavy
Thanks so much for stopping by!
Don't forget, you can follow me on InstagramTwitter and Pinterest to see what I'm up to.

Friday, July 14, 2023

Fresh Berries

Hello, crafty friends! Today I have a card that features the new Fresh Berries stamp set and dies from Pretty Pink Posh. This is such a fun set with all of the different berries, berry basket and sentiments.
I used just the strawberries from the set along with the leaves, berry basket, flowers and the die cut sentiment. I also used the strawberry stencil for my background and for me I think my card is a tad too busy. I tried to anchor my images by using a strip of red card stock down the middle but I think the next time I used this stencil I’ll use it on a colored piece of card stock so my images pop a little more. Along with the Fresh Berries set I used the Pretty Pink Posh Bee Friends set. I colored all of my images using copic markers and used foam tape to pop up the two bees and the flower on the basket.
Thanks so much for stopping by!
Don't forget, you can follow me on InstagramTwitter and Pinterest to see what I'm up to.

Monday, April 19, 2021

Seas of Life Card Set

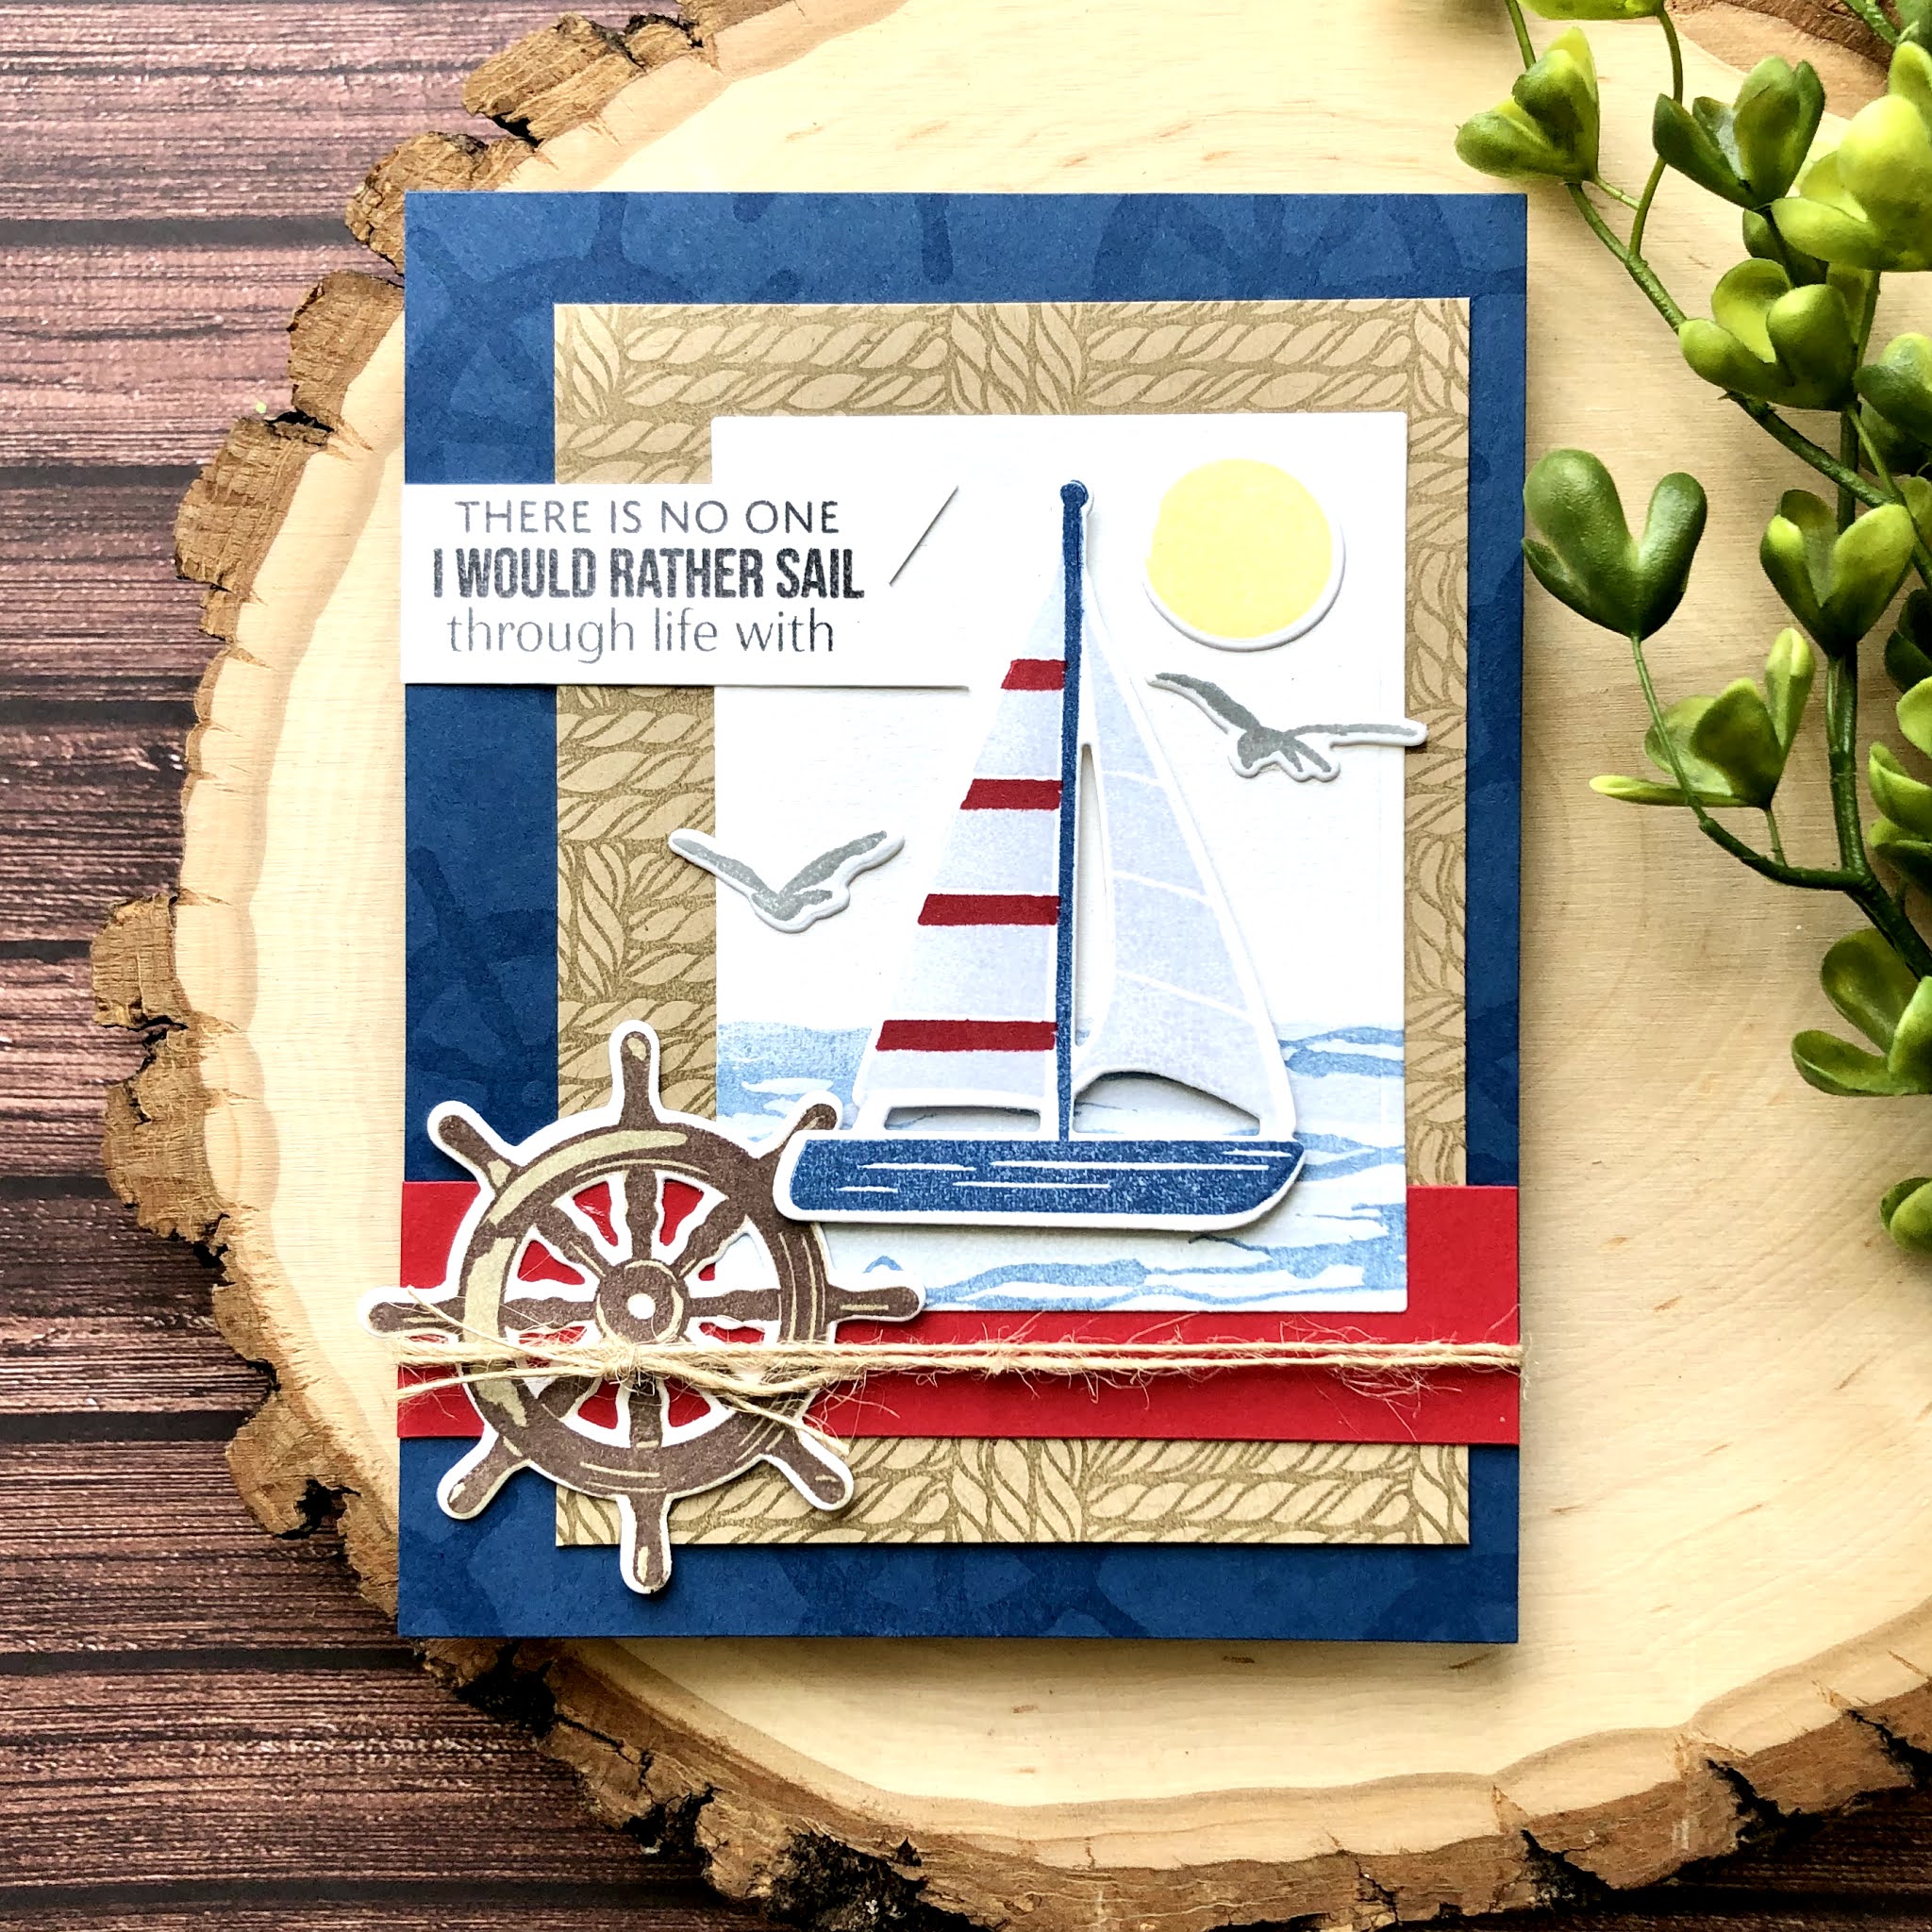
Hi there! Today I’m sharing two more cards that I designed for the Papertrey Ink/Ink to Paper April release. Both of my cards featured the new Seas of Life stamp set.
For my first card, I started out by using the Seas of Life dies to die cut the sail boat, wheel, sun and seagulls and then stamped them in enchanted evening, pure poppy, spring rain, harvest gold, kraft, dark chocolate and smoky shadow. Next I cut a rectangle from white card stock and stamped the wave images along the bottom. After that I randomly stamped the ship wheel onto a panel of enchanted evening for my background and then used the new Weaved Background stamp to stamp a piece of kraft card stock. Once that was done, I assembled my card, popping up the sail boat with foam tape, added my sentiment and tied on a piece of twine.
For my next card, I again used the Seas of Life stamp set and dies and die cut and stamped in the same colored inks but I used the Tin Stitched Border Bling die for my background and used one of the larger sentiments from the set as a focal point.

Wednesday, April 14, 2021

Somebunny Loves You! - CTD638

Hello, Hello!! I’m hostess this week over at the Color Throwdown Challenge and I’ve chosen some bright cheerful colors for all of us to create with! I hope you’ll join in and play along, I’d love to see what you create.
For my card today I used a new to me stamp company called Colorado Craft Company and I used the Bunnies & Robin stamp set which is illustrated by Anita Jeram. It was hard to hold back and not order a bunch of these darling stamp sets that Anita Jeram illustrated but I decided to start out with just a few.
To create my card, I started out by using my Misti tool to stamp the large scene stamp from the set onto white card stock. I also stamped the bunnies and bird images and used the Bunnies & Robin dies to die cut them out. Next I colored all of my images using copic markers and trimmed down my background scene. On top of a white card base I added a piece of yellow check Echo Park dots & Stripes paper and a strip of Doodlebug Design blue gingham paper with an edge of scallop. I added my square image with foam tape and glued on my sentiment along the bottom. For a touch of sparkle I added some yellow Stickles glitter on a few of the flowers.
For more inspiration, check out the design teams blog links below or you can go to the Color Throwdown blog for details on how to play along and see all of the sample entries in one location.

Amy Rohl
Amy Rysavy
Thanks so much for stopping by!
Don't forget, you can follow me on InstagramTwitter and Pinterest to see what I'm up to.

Wednesday, February 10, 2021

Bugs & Kisses Valentine Card - CTD629

Hello, hello! I hope you’re having a good day! It’s Wednesday and time for this week’s Color Throwdown Challenge where we have some fun colors to create with.
For my card I used the cute Lawn Fawn stamp set, Bugs & Kisses along with the Bugs & Kisses dies to create a Valentine. I started out by stamping and die cutting my images and then coloring them using copic markers. For my background I used the Outside In Stitched Square dies and die cut a piece of Doodlebug dot-stripe hot pink paper as well as a piece of black card stock.

I used the Stitched Scalloped Circle Frames and die cut white and pink card stock and then stamped my sentiment onto the white circle and adhered my images, popping up the bugs and also the black background square.
For more inspiration, check out the design teams blog links below or you can go to the Color Throwdown blog for details on how to play along and see all of the sample entries in one location.

Amy Rohl
Amy Rysavy
Thanks so much for stopping by!
Don't forget, you can follow me on InstagramTwitter and Pinterest to see what I'm up to.

Wednesday, July 29, 2020

Coffee and Chocolate Chip Cookies - CTD604

Hello friends! It’s Wednesday and time for this week’s Color Throwdown Challenge
For my card I used a two different Lawn Fawn stamp sets to create a simple card with a more masculine look. I used the Thanks a Latte stamp set and dies along with the Milk and Cookies stamp set and dies

I used a square card base and added a panel of Doodlebug kraft in color black herringbone paper and then used the Outside In Stitched Rectangle dies to first die cut a piece of kraft Doodlebug Design dot-stripe paper and then to die cut a piece of white card stock for my images. I colored my images with Copic markers and adhered them to my white stitched rectangle, popping up the one chocolate chip cookie with foam tape and then added my sentiment which I stamped onto an Everyday Sentiment Banners die.
For more inspiration, check out the design teams blog links below or you can go to the Color Throwdown blog for details on how to play along and see all of the sample entries in one location.

Amy Rohl
Amy Rysavy
Thanks so much for stopping by!
Don't forget, you can follow me on InstagramTwitter and Pinterest to see what I'm up to.

Monday, June 22, 2020

You’re the Burger to my Fries

Hello there! I’m up over on the Sunny Studio Stamps blog today sharing a card I created featuring the fun Cruisin’ Cuisine and dies.
The Cruisin’ Cuisine stamp set is such a fun set with so many options to switch up the cute food truck with hot dogs, ice cream and more. The first thing I did to create my card was to stamp the two images from the set, the truck and hamburger with fries. I also stamped the three bottles of sauce and added the words burger bus on the door. I colored these images using Copic markers and then used the Cruisin’ Cuisine dies to die cut them out.
Once my images were done I used two pieces of the Classic Gingham Cardstock paper one in red and another in yellow and I used the Frilly Frames Retro Petals dies to die cut a stitched edge on both pieces. Next I used my Misti tool and stamped my sentiment on the yellow bottom piece, added a strip of black cardstock above and die cut a Stitched Semi-Circles from white cardstock. I added my images using foam tape and my card was complete.

Sunday, May 24, 2020

For You - Spellbinders Large Die of the Month

 Hello! I’m popping in today to share a card that I created using Spellbinders Large Die of the Month for May. The Kaleidoscope Card Creator dies are so unique and beautiful and allow you to create standard size cards or square.
 For my card, I used the Large Die of the Month dies along with three shades of cardstock and die cut them from light to dark, (aqua mist, Hawaiian shores and tropical teal) and glued the pieces together. 

I attached all of my outside pieces to a white card base and then used the center and die cut it from white cardstock and stamped my sentiment from a Calligraphy Classics Papertrey Ink stamp set. I also stamped a few stems from the set in hawaiian shores ink around my sentiment and then using foam tape adhered it to my card. For a bit of bling, I added aqua rhinestones in the center of each corner flower.

Tuesday, May 19, 2020

Butterfly Collection

Hello, hello! A few weeks ago I posted the butterfly card pictured in the upper right corner above (you can view details here) and after that I almost forgot to post the other two cards I created using the same colors. So today I thought I’d share the whole set.
 For all of the cards, I used Flora and Fauna stamp sets, mainly the Butterfly Jar set. I used different layouts for each card but used the same Copic markers to color all of the images. I fussy cut the large butterflies on each of the cards as well and used iridescent sequins and Wink of Stella clear glitter pen on all of the butterflies.
 This first card I created for my mom for Mother’s Day. The love you sentiment is from the Owl Always Love You set.
 For the second card, I used the Glass Dome set for the birthday wishes sentiment.
Thanks for stopping by!

Monday, March 2, 2020

You’re my Knight in Shining Armor

Hello, there! I’m up over on the Sunny Studio Stamps blog today where I’m sharing a fun card that I created featuring the new Heartstrings Border Dies.
 To create my card, I used the sweet stamp set, Enchanted along with the Enchanted dies. I started out by stamping some of the images from the Enchanted set and coloring them using Copic markers then die cut them out. Next I used the Frilly Frames Retro Petals dies and die cut a piece of the pretty yellow daisy paper from the Spring Fling cardstock pack. After that I cut a strip of the same pattern paper in lavender and used the Heartstrings Border Die and die cut a strip of white cardstock and layered them together. 
Once that was done, I die cut a rectangle and blended on some tumbled glass distress oxide ink along the top and used the grass die from the Sunny Sentiments dies. I adhered my images, popping up the knight, princess and rectangle with foam tape and stamped my sentiment from the Enchanted set along the bottom. 
Thanks so much for stopping by!