skip to main |
skip to sidebar
Hello there! Thanks for stopping by. Today I’ve got a fun shaker card that I’m sharing where I used some new (to me) products from Queen & Company.
Usually shaker cards are a bit of a struggle for me with all the cutting of foam tape, acetate and having everything line up just right. Well after receiving the Love Jar Kit and some other supplies from Queen & Company, I can tell you it was so much easier to make a shaker card. Everything is pre-cut and ready to go which made it much more fun.


To create my card, I die cut a bunch of the stems, flowers and leaves along with the heart tag using the Love Jar Flowers & Stems dies and then stamped the flowers in a rainbow of colors and the stems in new leaf ink. I stamped the tag with the heart image from the kit in red ink and then stamped the for you sentiment. Next I used a piece of gray dot paper from the Love Jar Kit along with the mason jar lid die and die cut it out. After that, I used the Dots Paper Pad and die cut the mason jar, the red polka dot for under the lid, the yellow polka dot for my background and the red dotted paper for along the bottom of my card. Once all of my pieces were cut, it was time to assemble my shaker. I arranged my stems how I liked them onto the pre-cut white paper shaped as the mason jar and glued them down. Then I removed the backing to the pre-cut foam mason jar piece and adhered that on top of my stems. Next I used my anti-static powder tool all inside the opening where my shaker bits would go and then added some of the Love Jar Flower Toppings from the kit along with some clear Pastel Diamonds Toppings. Once my shaker bits were added, I adhered the pre-cut acetate and die cut aqua paper to seal it up. I wanted my stems to come out of the opening in the lid and not behind it so what I did was to use a piece of press n seal along the top of my stems coming out of my shaker and then cut the stems right at the top of the jar then adhered the lid to the jar, insert my stems through the hold in the lid and glue them from the back. Super easy and gave me the look I wanted. All that was left to do then was to tie on some yellow bakers twine from the kit and add my tag then adhere everything down, popping up my flowers with foam tape and added some fun yellow Goosebumps and some rhinestones from the kit.

Thanks so much for stopping by!
Don't forget, you can follow me on Instagram, Twitter and Pinterest to see what I'm up to.

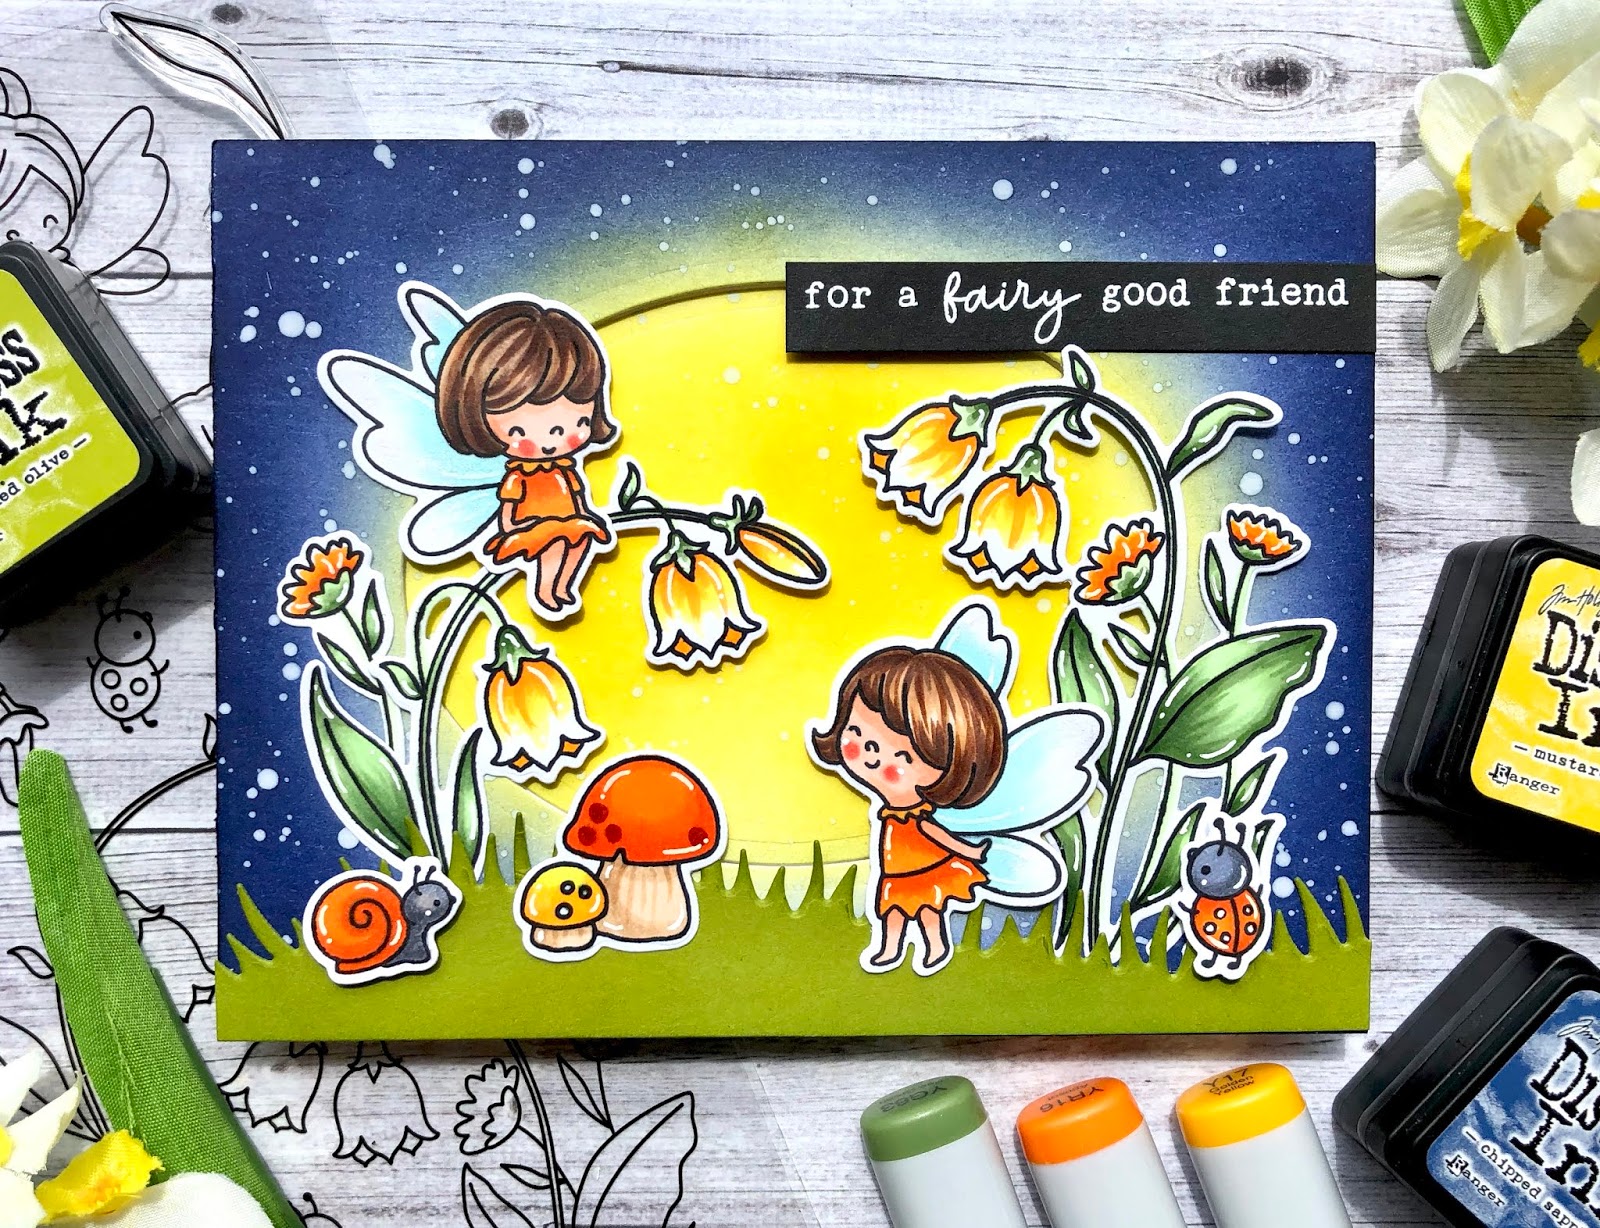
Hello, Hello! I’ve been on a card making kick and totally inspired by the new Hello Bluebird stamp sets, Fairy Garden and Garden Friends. If you follow me on Instagram, you know I love gardening. Every year I pant vegetables in raised beds, I have an herb garden, a fairy garden, roses, perennials and a pond so the adorable images in these new stamp sets really hit home. This is the third card I’ve created using these sets, if you’d like to see the other two cards, you can either scroll down or click here or here. Today I used the sweet bird images from the Garden Friends set to create a birthday (or Bird-day) card. I thought of birds singing in the early morning with the sun coming up.

My card for today was created using much of the same supplies as the last two cards I create over the past few days where I used the Fairy Garden set with coordinating dies along with the Garden Friends set with dies except for the background on this card I used mustard seed distress ink for the center, then spiced marmalade and on the edges, I used ripe persimmon. I also used a brighter green for my grass, I used new leaf cardstock and blended on some ripe avocado ink along the edges. I popped up the two mushrooms with ladybug, the snail, butterfly and the singing bird with foam tape. I also added some Wink of Stella clear glitter pen to the butterfly and the orange flowers.
Thanks so much for stopping by!
Don't forget, you can follow me on Instagram, Twitter and Pinterest to see what I'm up to.
Hello crafty friends! It’s Wednesday and time for a new Color Throwdown Challenge. Our colors for this week are yellow, orange, navy and green.
I was super excited to receive two new stamp sets with dies from the last Hello Bluebird April release, I couldn’t wait to ink them up and get creating. So the card I have for today was created using the Hello Bluebird stamp set Fairy Garden along with the coordinating dies. I also used the little snail and a flower images from the Garden Friends stamp set and dies. Both sets have the sweetest images in them that coordinate so well together.

To create my card, I started out by stamping a bunch of images from both the Fairy Garden set and the Garden Friends sets then colored them using Copic markers and then die cut them out. Next on a piece of white cardstock cut to card front size, I used some mustard seed distress ink and blended the yellow in the center and then used some chipped sapphire distress ink along the edges. After that I watered down some white craft paint and using a paint brush tapped against my hand added some white splatters all over my ink blended piece. Once that was dry, I used an oval die to cut out the center. I then attached the yellow center piece to my card front. Then I attached the rest of the panel/frame using foam tape. I die cut a piece of simply chartreuse cardstock using the Grassy Hillside Borders die and blended on some crushed olive distress ink and adhered that to my card front. Then came the fun part of adding my images. I used more foam tape to adhere the snail, ladybug and fairies along with adding some under the flower that fell over the die cut oval. For my sentiment, I heat embossed with white embossing powder onto a strip of black cardstock. For some finishing touches, I used a white gel pen for some highlights and on the fairies wings (see pictures below) I used some Wink of Stella clear glitter pen.


For more inspiration, check out the design teams blog links below or you can go to the Color Throwdown blog for details on how to play along and see all of the sample entries in one location.
Amy Rohl
Amy Rysavy
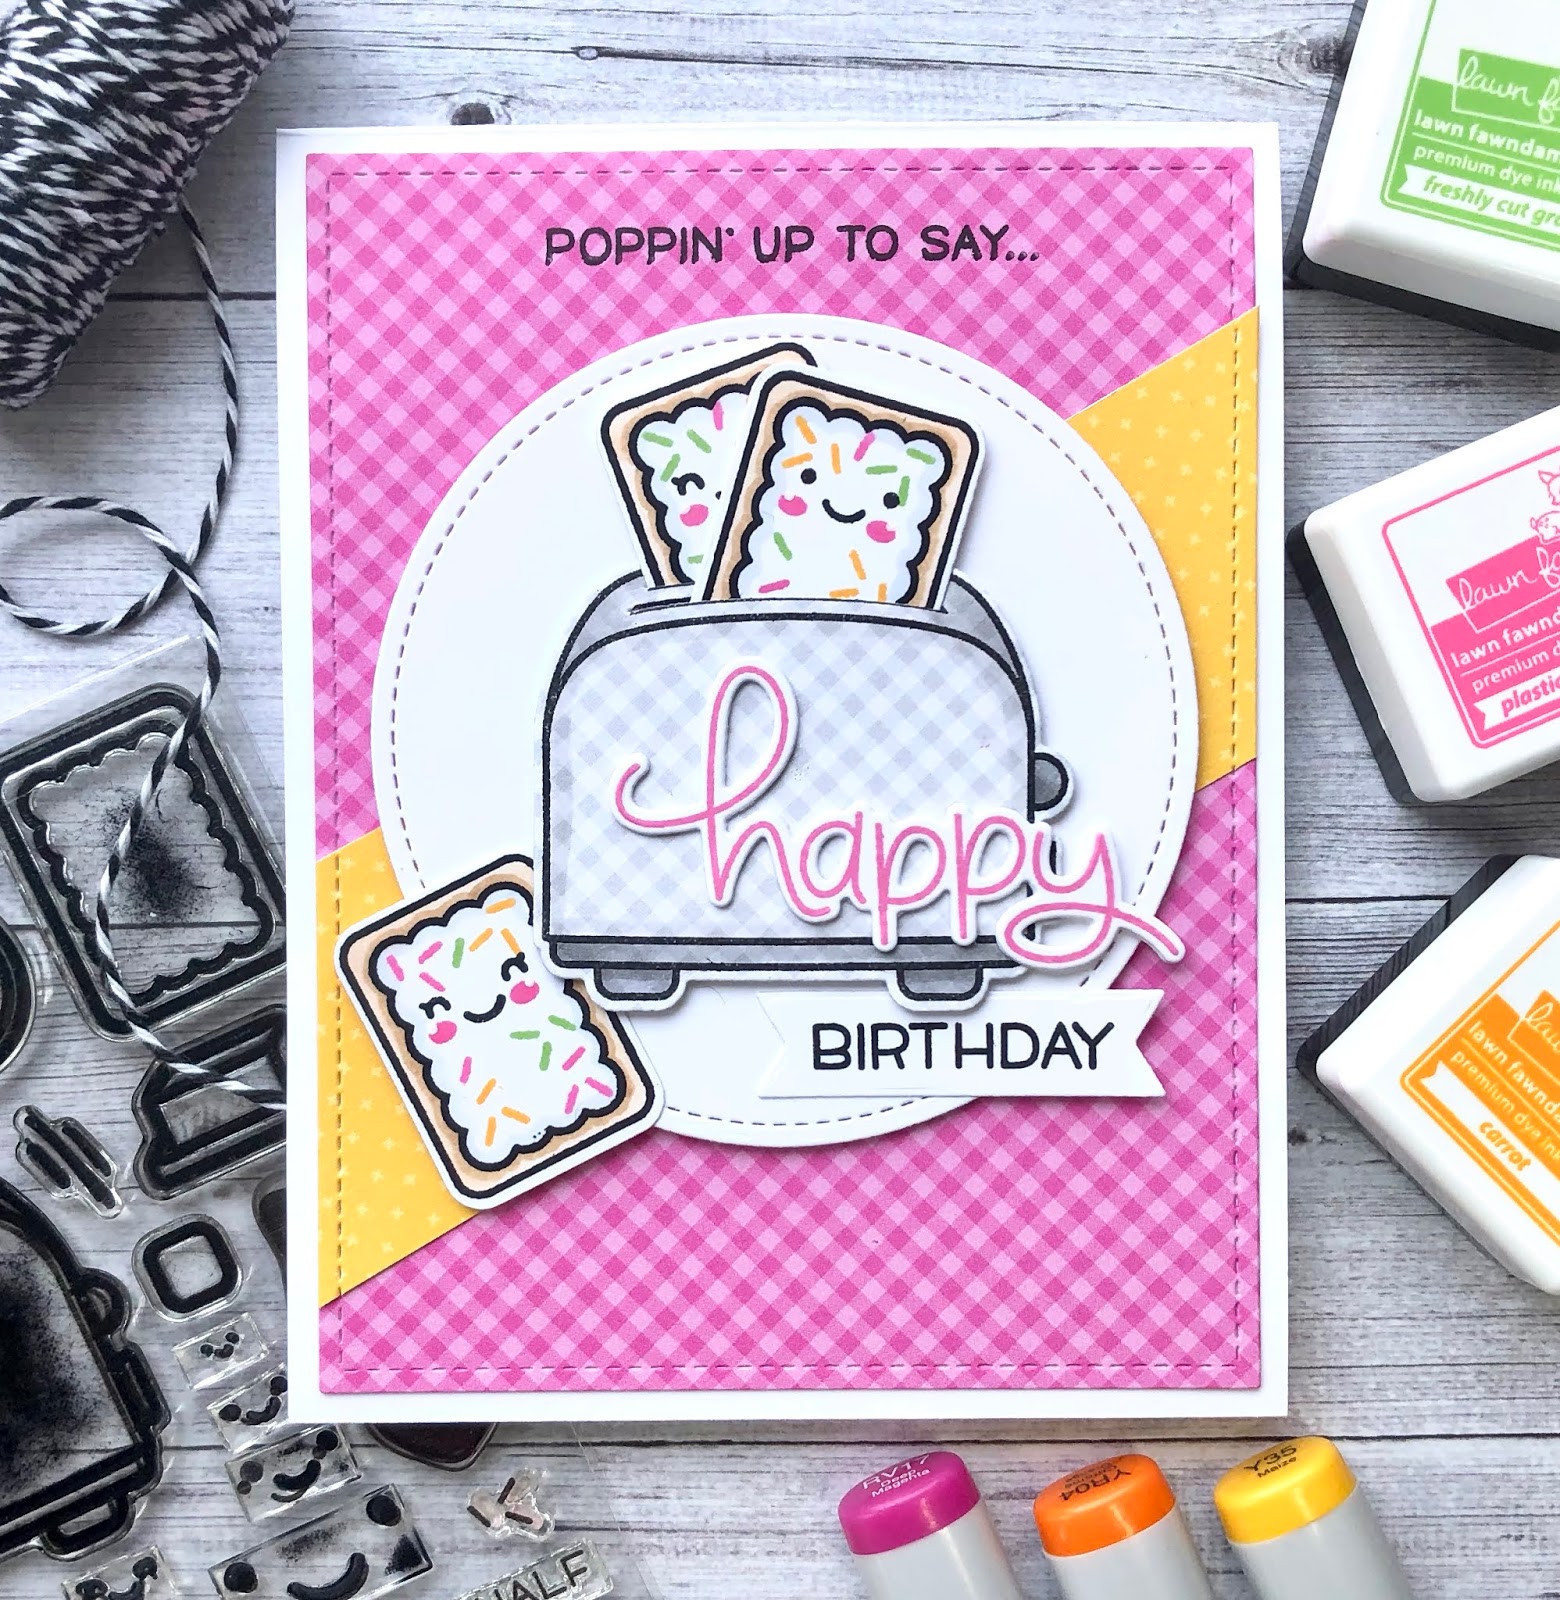
Hi there! Today I’ve got my final project for the Lawn Fawnatics Challenge up over on the Lawn Fawnatics blog. It was so fun guest designing for this challenge, I love doing sketch challenges because I think they help you try something new, a different layout that maybe you wouldn’t normally try. I hope that you’ll take the time to play along!
For my card, I used the Lawn Fawn stamp set Oh Gnome along with the Oh Gnome dies to create a birthday card. These little gnomes are so adorable and fun to create with and with all of the images not only in the Oh Gnome set but with some of the other Lawn Fawn garden themed sets as well.
To create my card, I started out by stamping some of the images from the Oh Gnome set and coloring them using Copic markers (B21,B23, B24, B18, Y17, Y35, YR23, YG07, YG09, R05, R24, R27, E11, E95, E30, E31, E25, E27, N4, N7, C1, T3, 0) then die cut them out. Next I die cut the Mushroom House from Vanilla Malt and Chili Pepper cardstock and blended on some frayed burlap and candied apple distress inks. I die cut the little door and window to the mushroom house from a piece of yellow Knock on Wood paper. After that, I used the Outside In Stitched Circle Stackables dies to die cut a white cardstock circle and blended on some broken china distress ink for my sky. I used some Cilantro cardstock with the Grassy Hillside Borders die for the bottom of my die cut circle and then adhered the mushroom house with foam tape. Once my mushroom house was adhered to my die cut circle, I added the three mushroom images, the smallest red mushroom from the Gleeful Gardens stamp set. I added the girl gnome with flower, a die cut butterfly, the black smoke stack and the happy birthday sentiment which was from the Wavy Sayings set and stamped onto a Simple Wavy Banner.

For the base of my card, I used a piece of Really Rainbow Scallops paper along with a piece of green Spring Fling paper and die cut them using the Outside In Stitched Rectangle dies. Next to give the illusion of the diagonal stripes from the sketch, I used the Little Picket Fence Border die and die cut it from white cardstock. Before adhering down my white picket fence, I blended on some broken china distress ink so the fence would pop a little more then I adhered two pieces of the green Spring Fling paper that I die cut using the Stitched Hillside Borders dies and Grassy Hillside Borders dies and I had blended on some lucky clover distress in along the edges. For my sentiment which was one long line, I used my Misti tool to stamp one half on top of another. Once my card base was done, I adhered my circle with the mushroom house using foam tape, added the two clouds which were from the Starry Backdrops stamp set and added the boy gnome with wheelbarrow.
Thanks so much for stopping by!
Don't forget, you can follow me on Instagram, Twitter and Pinterest to see what I'm up to.
Hello everyone and thank you for stopping by. I’ve got some super exciting news! I’m honored to be guest designing over at the Lawn Fawnatics blog! I can hardly believe it! The challenge that starts today is to design a card using the sketch below.
For my card, I used the Lawn Fawn stamp set Be Hap-pea along with the coordinating Be Hap-pea dies and the Double Slider Surprise dies to create a birthday card. I took some creative license with the sketch and instead of doing diagonal stripes on my card, I used images from the Be Hap-pea set to indicate where the stripes would be.

To create my card, I started off by stamping several of the peas, pea pods, leaves and tendrils from the Be Hap-pea set and coloring them using Copic markers (YG03, YG06, YG07, YG09, Y11, Y15, Y17, 0). While coloring the pea pods, I tried to indicate the seeds/peas inside each pod by leaving circular areas a lighter green. I also used some candied apple distress oxide ink to stamp the cheeks on the peas and used white gel pen for highlights on all of the images. I used a white card base, then added a piece of the new Spring Fling paper which I die cut using the Outside In Stitched Rectangle Stackables die. Next I die cut all of my main pieces for the Double Slider Surprise from white cardstock and die cut the slider pieces (the panels that pull out) from both white cardstock and Perfectly Plaid/Daffodil and adhered them together. Before I assembled my slider card, I adhered my images to the slider panels and on the bottom panel stamped my sentiment and music notes.

For the center pocket piece of my slider and the tabs to pull the panels out, I used more of the Spring Fling paper in yellow and green and used the Stitched Scalloped Circle Frames die to die cut a white scalloped circle for the center. I adhered my pea images within the scalloped circle, popping up the speech bubble and a single pea outside the circle with foam tape. Next I stamped the hap-pea sentiment and die cut a total of three of them and glued them together for added dimension, then stamped the birthday sentiment underneath. Once my whole double slider was completed, I added it to my card using foam tape.
Thanks so much for stopping by!
Don't forget, you can follow me on Instagram, Twitter and Pinterest to see what I'm up to.