Wednesday, September 27, 2017

Jump for Joy - (CTD462)

Hello!  It's Wednesday and time for this week's Color Throwdown Challenge.  We've got some great fall colors to create with this week and we hope you'll play along.
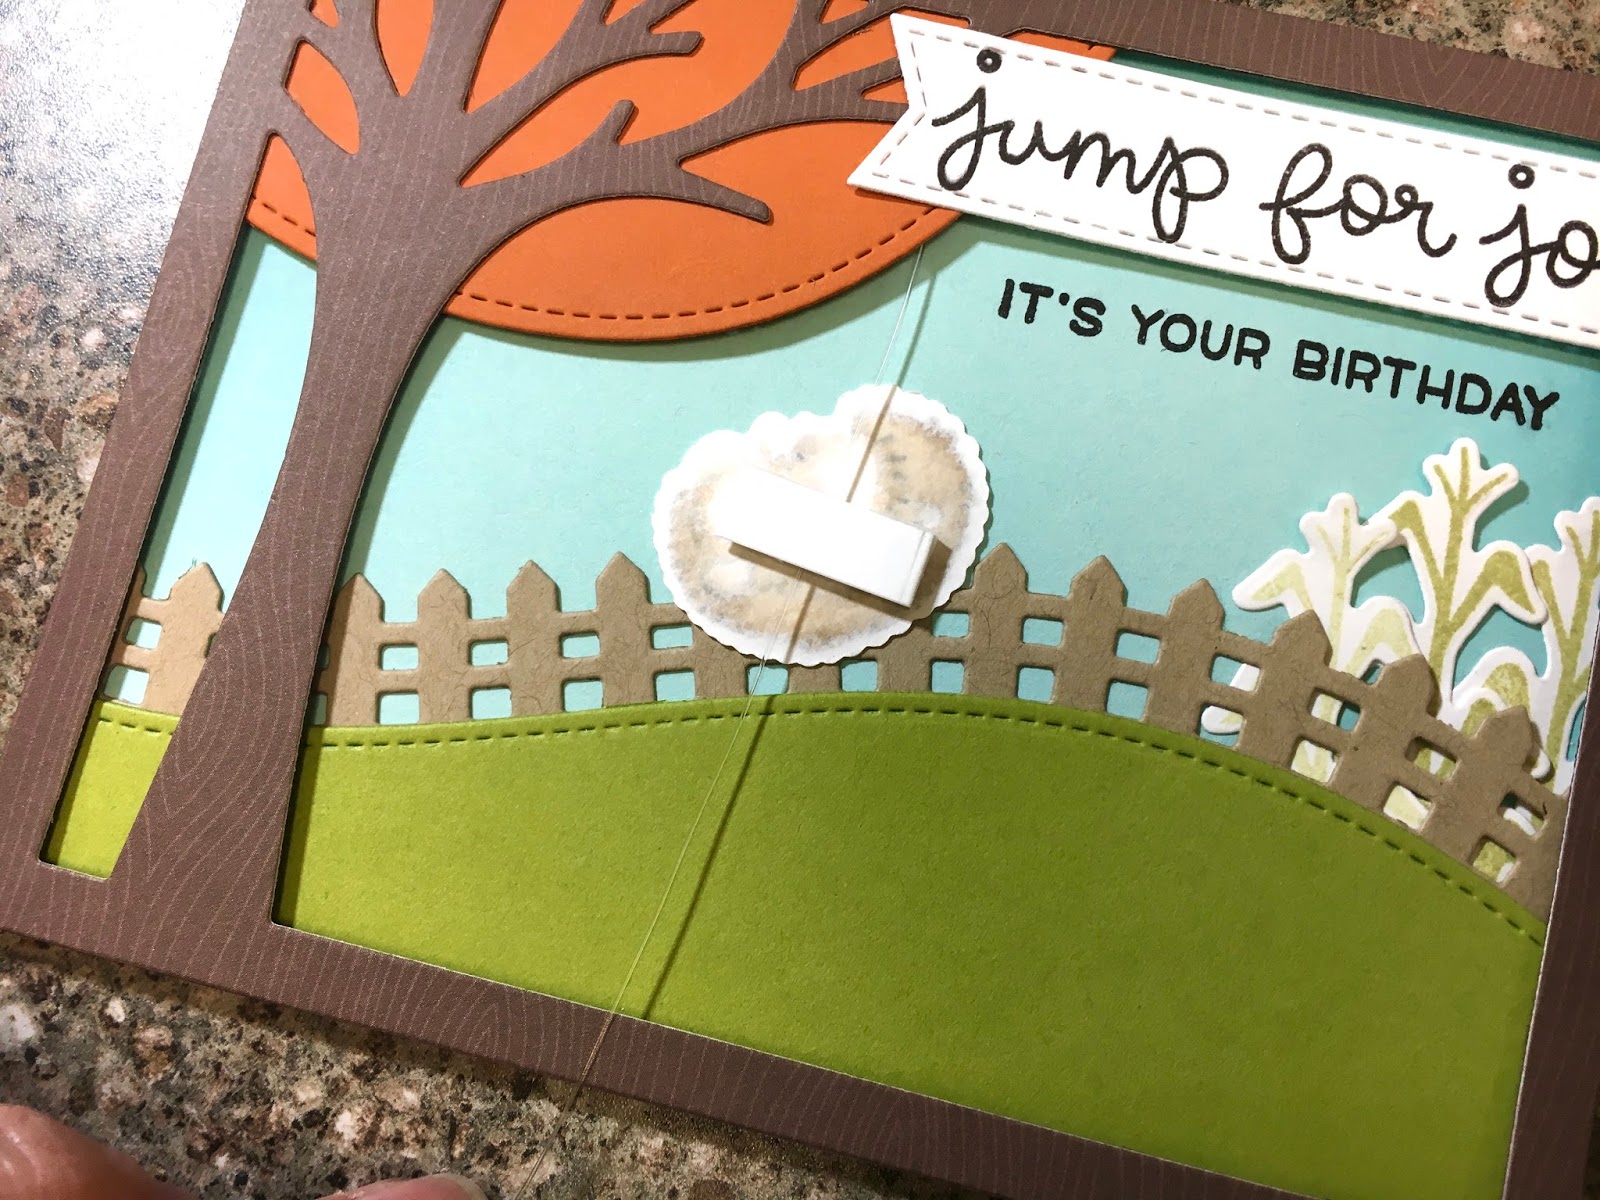
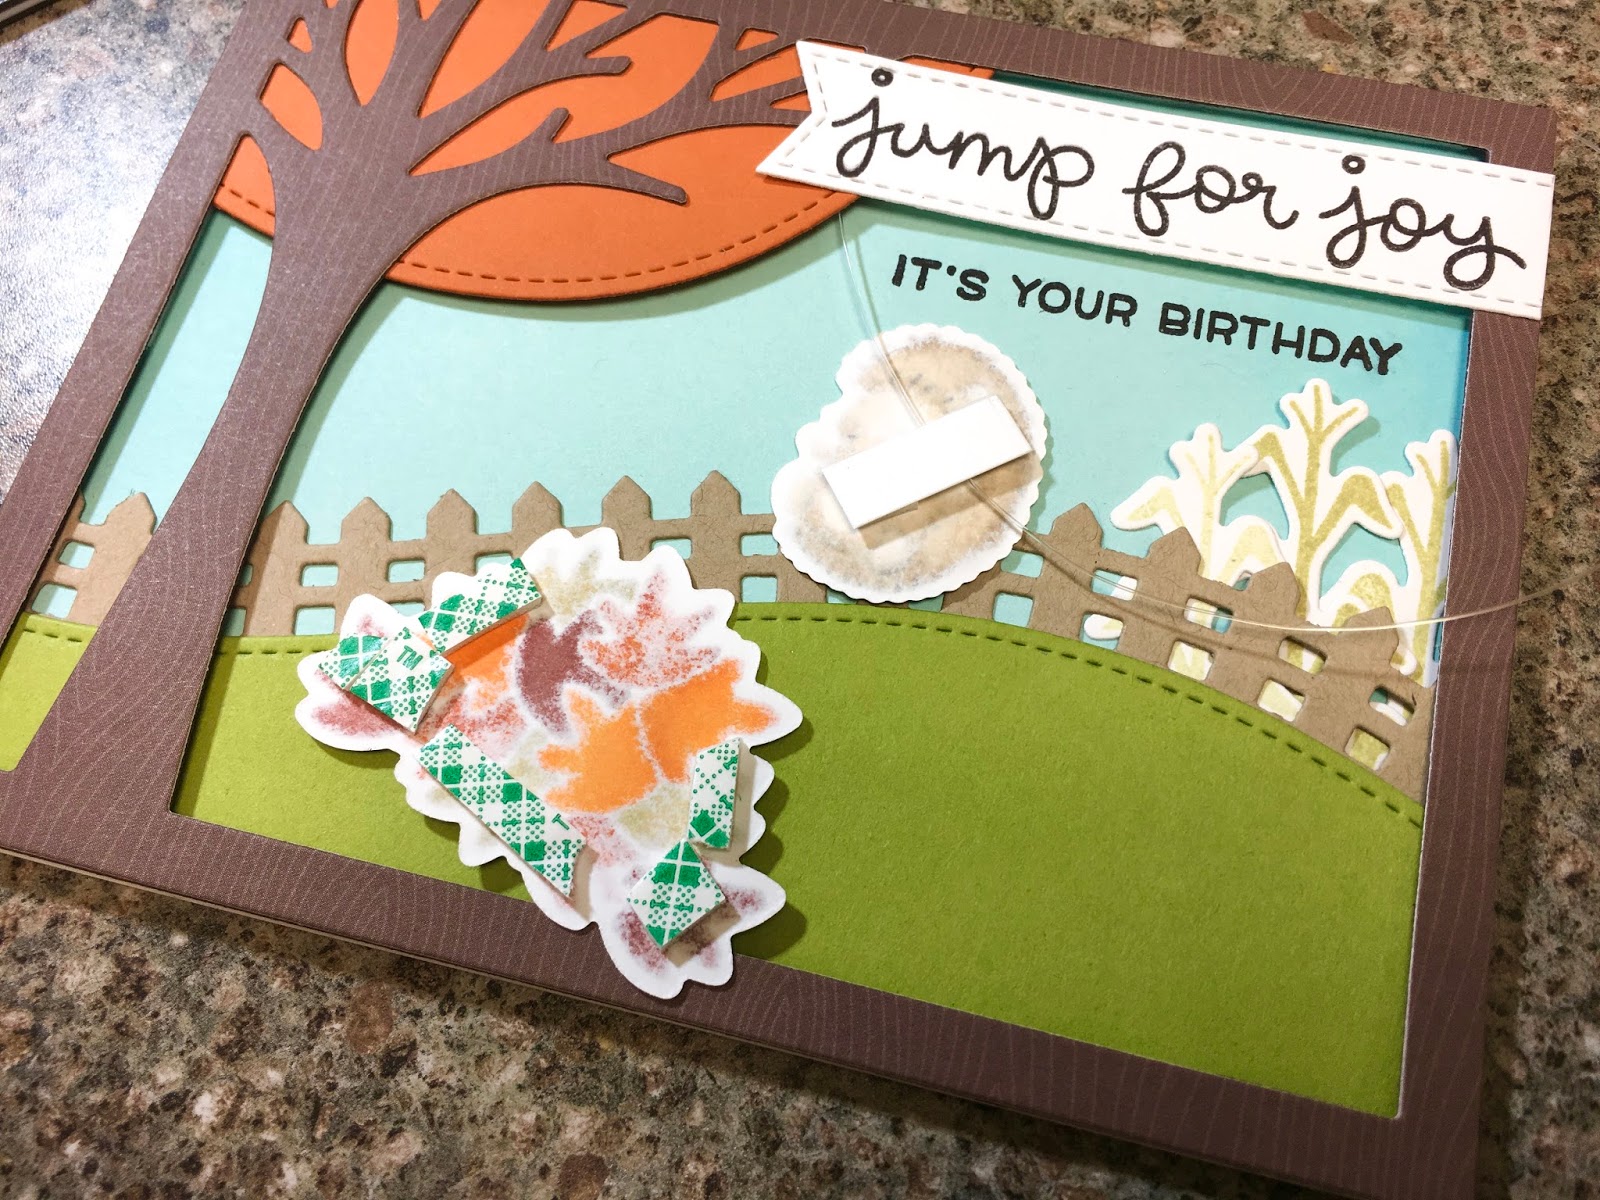
 If you're a Lawn Fawn fan, you've probably seen several cards that look very similar to the card I'm sharing today using the Jump for Joy stamp set and Jump for Joy dies but I've wanted this set since last year and couldn't wait to create this fun scene.  The one thing that I can say is different other than a few added details is the fact that I created my own slider so that the cute hedgehog slides up and down the card front without using any slider dies.  I used some aqua mist cardstock for my background which I had blended on some peacock feathers distress ink, then I die cut my Little Picket Fence Border from kraft cardstock and used the Stitched Hillside Borders die cut from simply chartreuse cardstock.  I stamped a few corn stalks from the Happy Harvest set and tucked those behind the fence and then die cut the Leafy Tree Backdrop:Landscape die from a piece of the brown Knock on Wood paper pack and added foam tape to the back to pop it up.  Next I stamped part of my sentiment onto a Stitched Sentiment Strip and before adhering my Leafy Tree Backdrop, I used my Misti tool to stamp the second half of my sentiment onto my background piece. I stamped and colored all of my images with Copic markers then die cut them out.  To create my slider, I ended up cutting a small piece of white cardstock and added pieces of foam tape on the ends and attached this to the back of my hedgehog.  Then I took a piece of clear fishing line and attached that up under my popped up tree and fed the fishing line through the back of my hedgehog.  I added foam tape just around the edges of the pile of leaves, leaving a opening or pocket for the hedgehog to slide into and pulling the fishing line down straight, I removed the foam tape from the pile of leaves and attached it over the fishing line securing it in place.  It sounds more complicated than what it really is, it was actually very simple to do.  Below are pictures of what I was describing above and a quick video of how it works.
For more inspiration, check out the design teams' blog links below OR you can go to the Color Throwdown blog for details on how to play along and you can see all the sample entries in one location.

Amy Rohl
Amy Rysavy
Wanda Cullen
Tammy Hershberger - September Guest Designer


Thanks so much for stopping by!
Don't forget, you can follow me on InstagramTwitter and Pinterest to see what I'm up to.


Lawn Fawn JUMP FOR JOY Clear Stamps LF1212

Lawn Fawn JUMP FOR JOY Lawn Cuts Dies LF1213


Monday, September 25, 2017

Happy Birthday - PTI September Blog Hop

Hello there!  It's been ages since I've participated in a Papertrey Ink Blog Hop but this month I was determined to play along.  I absolutely love this month's PTI Blog Hop inspiration photo!  I'm a bird lover and when you throw in some pretty florals I'm in :)  That and I needed to create a special birthday card for a dear friend.
Blog-hop-logo
Blog Hop Inspiration
 For my card, I used my current favorite stamp set Gran's Garden (thank you Dawn McVey) along with the stamp sets, Spring Woods and Graceful Greetings for my sentiment.  I started out with a white card base then added a panel of black cardstock.  Next I used the Mix & Mat: Scallops Die to die cut a piece of white cardstock which I stamped my sentiment on.  I watered down some black watercolor paint and added some black splatters to my die cut piece and once it was dry, I adhered it to the front of my card with foam tape.  After that, die cut my pieces from the Gran's Garden set and my bird from the Spring Woods set along with a few leaves from the Rosie Posie set.  I stamped my roses in pure poppy & scarlet jewel, the leaves in simply chartreuse & ripe avocado, the buds in harvest gold & honey nut (stamped off).  The bird I stamped in canyon clay, harvest gold and black.  Once all of my pieces were stamped, I adhered them to my card front, popping up the top rose near the sentiment, and the bird using foam tape.  I added some black glitter to the centers of the roses and glued on some silver sequins.
I've created other Papertrey Ink cards using florals and either the Spring Woods or Winter Woods bird sets.  If you're interested you can view them here, here, and here.

Thank you so much for stopping by and I hope you enjoy the hop!

Saturday, September 23, 2017

Halloween Tags - (CTD461)

Hello and happy Saturday!  I'm finally posting the Halloween tags I created for the current Color Throwdown Challenge.  I've been having some photo uploading problems where the photos I take with my iPhone are not uploading to my Mac computer.  It's frustrating!  But I've got it working for right now even though I'm unable to use the photo editing program I usually use.
 Using this week's colors from the CTD challenge, I created a set of Halloween tags using the Lawn Fawn Stamp set, Booyah and the Booyah dies.  I die cut three white tags (I wish I had made them black but oh well) using the Stitched Circle Tags dies, then die cut circles of lovely lilac cardstock for each tag and blended on some wilted violet distress ink along the tops.  Next I used the Starry Backdrops set to stamp the stars on each lilac circle and attached them to the tag bases.  I die cut some new leaf cardstock using the Stitched Hillside Borders die and stamped each of the sentiments which were from the Spooktacular stamp set.  I stamped all of my images and colored them with Copic markers, then die cut them out and attached them to my tags with foam tape.  To finish off my tags, I added some white gel pen highlights to my images, some Yellow Stickles on the stars and some black and white bakers twine.  I love making fun tags like this that I can attach to goodie bags filled with treats that I can give away.
For more inspiration, check out the design teams' blog links below OR you can go to the Color Throwdown blog for details on how to play along and you can see all the sample entries in one location.

Amy Rohl
Amy Rysavy
Wanda Cullen
Tammy Hershberger - September Guest Designer


Thanks so much for stopping by!
Don't forget, you can follow me on InstagramTwitter and Pinterest to see what I'm up to.


Lawn Fawn BOOYAH Lawn Cuts Dies LF933

Lawn Fawn STITCHED CIRCLE TAGS Lawn Cuts Dies LF989

Lawn Fawn STARRY BACKDROPS Clear Stamps LF664


Saturday, September 16, 2017

A Magical Day

Hi there and Happy Saturday!  I'm popping in today to share a trio of cards that I made using the Avery Elle stamp set, Be a Unicorn.
The first thing I did was to stamp my images and color them using Copic markers.  Next I die cut my images using the Be a Unicorn dies and set them aside while I worked on my cards.  I cut three white square card bases from white cardstock, three square frames using the Single Stitched Line Square Frames die and six sections of clouds using the Puffy Cloud Borders dies.  After that, I die cut a square from a piece of computer paper to make a mask and added temporary adhesive to the back of it and placed it over the front of each card so that I could stencil in some clouds for my background.  A while ago I was in need of a cloud stencil and I improvised by making my own using the cloud dies I have and die cutting them from pieces of scrap watercolor paper.  So that's what I used on each card front (see photo below).  I used shaded lilac, spun sugar and tumbled glass distress inks and just moving the die cut cloud pieces around and flipping them over and blending on some distress ink and there you have it, clouds.  Once my background was finished on each card, I used my Misti tool and stamped my sentiment then I glued on my die cut frames and adhered the die cut clouds, popping up the top layer, and then added my stamped images.  To finish off my cards, I added some Wink of Stella glitter pen to the unicorns and some icicle Stickles to the stars.
These cards were so fun to create!  So girlie!  And of course I always dress up my envelopes with some stamping and washi tape.  I made goodie bags up for my daughter, her roommate and my niece, who all go to the same college, and put these cards inside them.  

Avery Elle Steel Die BE A UNICORN DIES 023659

My Favorite Things SINGLE STITCH LINE SQUARE FRAMES Die-Namics MFT951

Lawn Fawn PUFFY CLOUD BORDERS Lawn Cuts LF915

Wednesday, September 13, 2017

SMILE - (CTD460)

Hello!  It's time for this week's Color Throwdown Challenge!
For my card, I used the My Favorite Things stamp set Plentiful Petals along with the Plentiful Petals Die-namics to create a birthday card.  I started out with a white card base, then I die cut a panel of white cardstock using the Single Stitched Rectangle Frames and using the inside of the frame I used the Chevron Grid Stencil and blended on some brocade blue ink.  Next I glued on my stitched frame and adhered my stenciled center panel and stamped my sentiment from the All Smiles stamp set.  After that, I blended on some new leaf ink onto the bottom of a piece of new leaf cardstock and die cut my large Double the Smiles Die-namics sentiment and glued that above my stamped sentiment.  Next I stamped my three flowers in pacific point ink, the leaves in new leaf ink and the centers in limeade ice ink and die cut them out.  I adhered my flowers, popping up the largest one, and my leaves and glued on some sequins in the centers and two iridescent green on the stenciled panel.
For more inspiration, check out the design teams' blog links below OR you can go to the Color Throwdown blog for details on how to play along and you can see all the sample entries in one location.

Amy Rohl
Amy Rysavy
Wanda Cullen
Tammy Hershberger - September Guest Designer


Thanks so much for stopping by!
Don't forget, you can follow me on InstagramTwitter and Pinterest to see what I'm up to.