Friday, August 31, 2018

Hello Bluebird Bee Happy Day 3

 Good morning and thank you for popping in! Today I’m sharing the last card in my Hello Bluebird Bee Happy card series. This stamp set has been so fun to work with and I know I’ll be using it again in the near future.
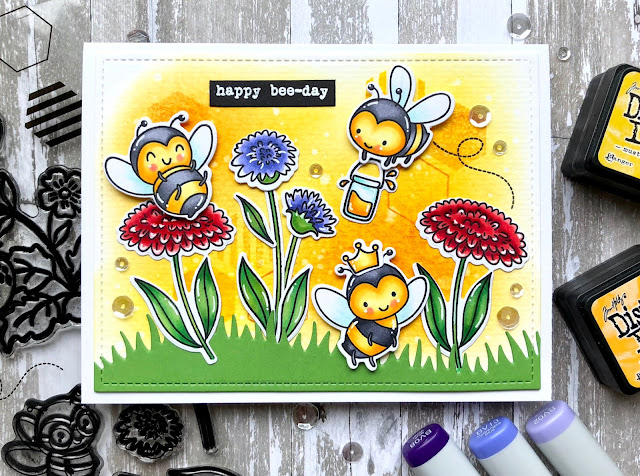
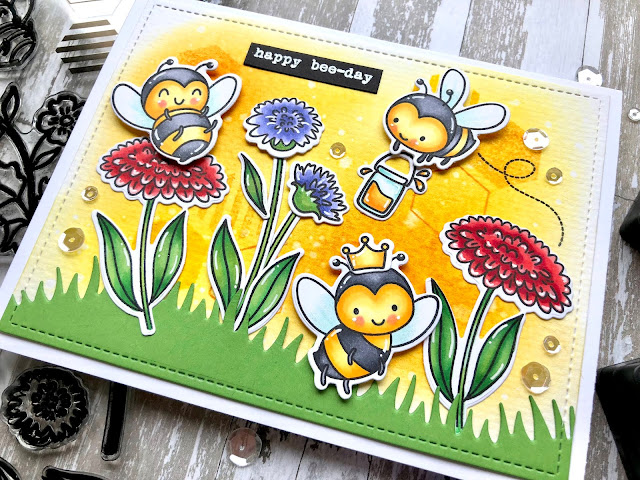
 The Bee Happy card I have for today is a shaker card and could be used as either a thank you card or a thinking of you card. Like my last two cards, I used a piece of watercolor paper and blended on some mustard seed and wild honey distress ink and stamped the three different hexagon images in groups.  Next I used my Grassy Hillside Border die and new leaf cardstock and adhered some green grass along the bottom of my ink blended panel. I used the new Hello Bluebird Gallery Frame Die #3 and die cut it once from white cardstock and again in summer sun cardstock. I heat embossed my sentiment again in white embossing powder onto a strip of black cardstock and then cut the words apart so that they would fit within the one square of the white die cut frame. After adhering my sentiment, I used foam tape and acetate to create my shaker and filled it with yellow sequins, yellow flower sequins, clear beads and small iridescent sequins for my shaker bits. After that I stamped and colored my images using Copic markers then die cut them out using the Bee Happy dies. I adhered all of my images, popping up the three bees with foam tape, and added some Wink of Stella glitter pen to the all the bee’s wings.
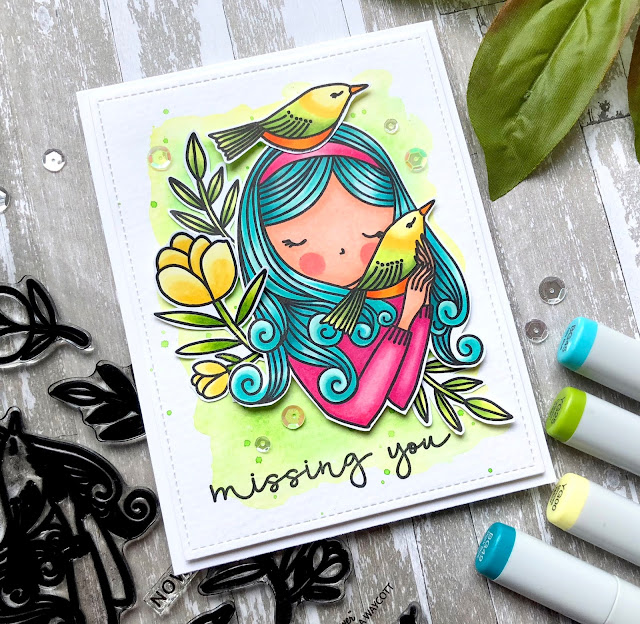
 Below you can see all of the Bee Happy cards in the collection together.


Thursday, August 30, 2018

Hello Bluebird Be Happy Card Series - Day 2

Hello there and Happy Thursday! I’m buzzing in today to share the second card in a series of cards that I created using the adorable Hello Bluebird stamp set Bee Happy. If you’d like to see my card from yesterday, you can click here or scroll down to my previous post if you’re viewing from my blog. 
The little bees in the Bee Happy set are so darn cute and fun to create with. And what I find ironic is the fact that just this last weekend (the same weekend I was finishing up these bee cards) I was stung by a bee while at the beach and I haven’t been stung since I was a kid.
To create my card, I started out by die cutting a piece of watercolor paper and a piece of summer sun cardstock using my Hexagon dies. After that I blended on some mustard seed and wild honey distress ink and then using the same inks, I stamped the three different hexagon images from the set. Once that was done I adhered the two pieces together and attached them to a white card base. Next I stamped my images and colored them with Copic markers, then die cut them out using the Bee Happy dies. For my sentiment, I heat embossed with white embossing powder onto a strip of black cardstock. Once all of my pieces were ready I adhered all of them to hexagon popping up three of the flowers and both of the bees. I added some Glossy Accents to the jar of honey to give it some shine, some Wink of Stella glitter pen to the bee wings and some iridescent sequins. I also used the colors for this week’s Color Throwdown Challenge #508 which are red, yellow, green and purple.
Thank you for your visit and have a great day!


Wednesday, August 29, 2018

Happy Bee-day - CTD508

Hello, hello and happy Wednesday! 
I’m hostess this week over at the Color Throwdown Challenge and I’ve chosen some vibrant colors for us to create with. I can’t wait to see what everyone creates!
It’s the end of summer here but our garden is still thriving with color. We had a family of bumble bees move in under a boulder step in our backyard and they were busy pollinating everything from our flowers to our vegetables this summer so when I found the inspiration photo for this week’s challenge, that's what I thought of, busy bees.
 For my card, I used the adorable Hello Bluebird stamp set, Bee Happy along with the coordinating Bee Happy dies to create a birthday card. The first thing I did to create my card was to die cut a piece of watercolor paper using the Outside In Stitched Rectangle Stackables die. After that I blended on some mustard seed and wild honey distress ink. Then I used all three of the different hexagon images from the set and stamped them onto my blended background using the same distress inks. I also splattered the background with water using a paintbrush then lifted the color off by blotting it with paper towel. Then I stamped my images and colored them with Copic markers and die cut them out using the matching dies. Once I had my images arranged where I liked them, I placed the dashed bee line stamp in place and removed my images and used my Misti tool to stamp it in black ink. I used the Grassy Hillside Border die for along the bottom of my card and then tucked some of the flower stems behind leaving one on top. I adhered everything down, popping up all of the cute bumble bees with foam tape. I stamped and heat embossed my sentiment  with white embossing powder onto a strip black cardstock and added that along the top. To add a bit of shimmer, I used some Wink of Stella glitter pen on all of the bee’s wings, added some white gel pen highlights and some Pretty Pink Posh sequins.
For more inspiration, check out the design teams' blog links below OR you can go to the Color Throwdown blog for details on how to play along and you can see all the sample entries in one location.

Amy Rohl
Amy Rysavy
Wanda Cullen
 Joy Taylor - August Guest Designer


Thursday, August 23, 2018

Missing You

 Hello! I hope you’re having a good week. I’ve been busy getting our youngest son ready to go back to school, he starts middle school right after labor day. It’s hard to believe that summer is almost over. Today I’m sharing another card made with the Waffle Flower stamp set Always illustrated by Flora Waycott. I absolutely love this image and while on a trip up north with my family, we had a rainy day and I sat and colored several of these images (see photo below).
 The card I’m sharing today is one of the more colorful images I colored using Copic markers and the Always set. I went with lime greens, yellows, aqua blues and magenta. I used a piece of watercolor paper and die cut it using the Outside In Stitched Rectangle Stackables die then watercolored the panel with my Jane Davenport bright palette watercolors using Jimminy lime green and mermaid teal with lime green splatters. After my watercolor panel was dry, I used my Misti tool and stamped my sentiment then I added my images, popping up the girl, large flower and the bird on her head. To finish off my card, I added some iridescent lime green and clear sequins around my image and adhered my panel to my card base with foam tape.
 Below you can see all of the images I’ve colored so far (with two cards completed) which are waiting to be made into cards. I colored one red head, black, blonde, brunette and the one I’m sharing today with aqua hair. I really wish that Waffle Flower would come out with girl images like these for different seasons with leaves for fall, pine boughs for winter and maybe different flowers for summer. Wouldn’t that be great?
Thank you for taking the time to visit.