Showing posts with label Honey Bee Stamps. Show all posts

Wednesday, March 9, 2022

Market Cart - CTD683

Hello! It’s time for this week’s Color Throwdown Challenge where we have some great new colors to creates with! We hope you’ll take the time to play along.
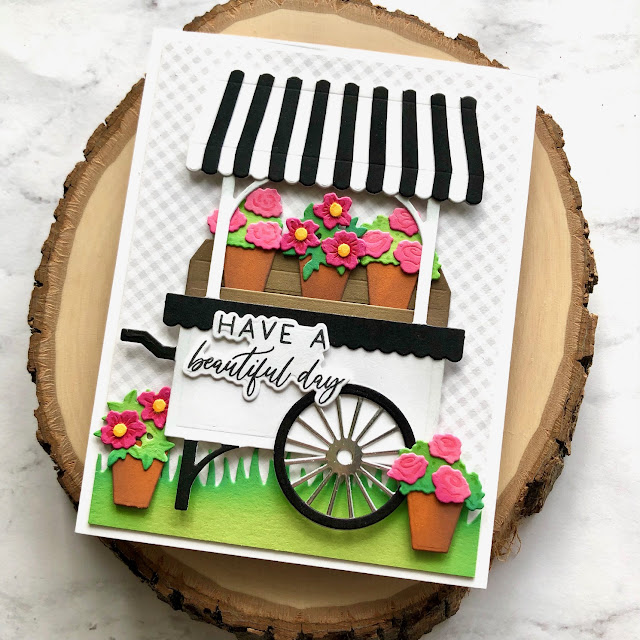
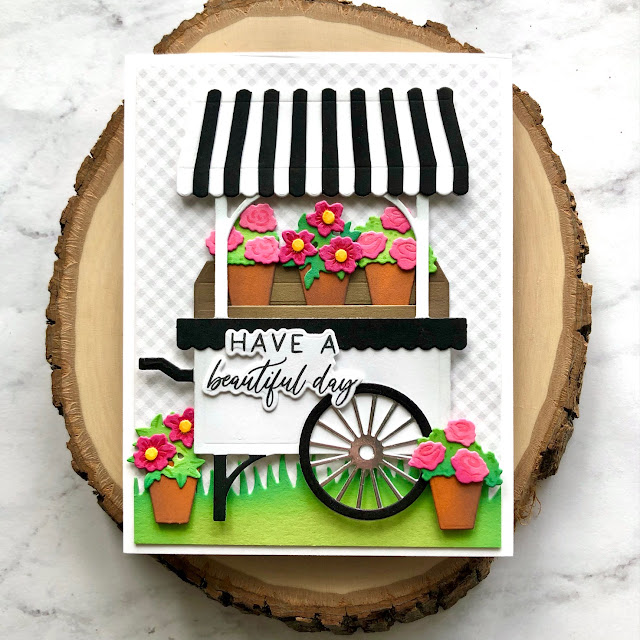
Some weeks when I’m creating my card for the Color Throwdown Challenge I use not only the colors but the inspiration photo as well, but this week since I was so exited to use my new Market Cart dies and Squeeze The Day sentiment set and dies from the latest Honey Bee Stamps release, I couldn’t resist and just went for using the challenge colors and adding in some neutrals like the browns and black.
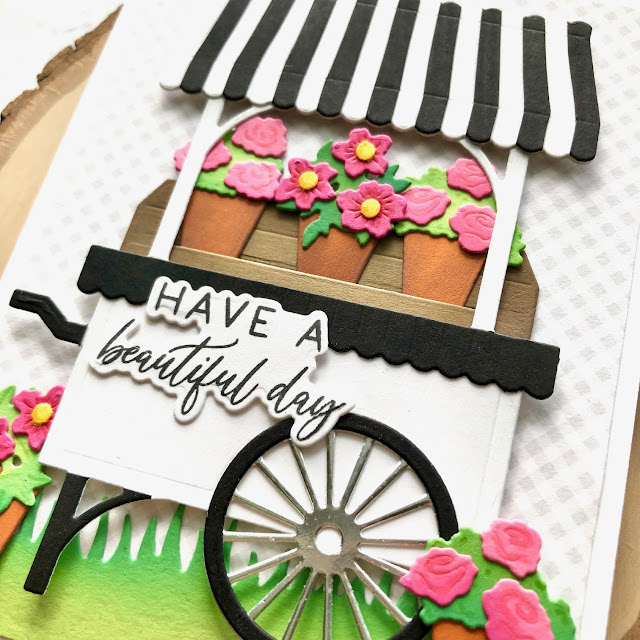
I’ve been on such a kick for stamping and coloring images to create a card that die cutting and doing more paper crafting using the Market Cart dies was a break from that and a ton of fun. I started out by die cutting the cart from white card stock and the push handle and leg of the cart from black card stock. Next I die cut two of the awing pieces, one from white card stock and the other black and using the score lines I cut the black one and glued on the pieces to create a striped awning.
After that, I used some silver metallic paper and black card stock and cut and glued the wheel and also the middle scalloped piece of the cart. Once that was done I die cut the pots, flowers and greenery. 

Once all of my pieces were die cut, including the grass, I blended on some distress oxide inks to give dimension. I used lucky clover for the grass and greenery, vintage photo on the clay pots and walnut stain on the wooden display shelves for the pots. I also used a few copic markers on the flowers to highlight the detail in the die cut pieces. For my background I used a piece of gray gingham paper and then popped up the whole cart and the front flower pot using foam tape. To finish off my card, I used the new Squeeze the Day sentiment set and dies (I love that they have dies for their sentiments) and added it to the front of my cart.
For more inspiration, check out the design teams blog links below or you can go to the Color Throwdown blog for details on how to play along and see all of the sample entries in one location.

Amy Rohl
Amy Rysavy
Thanks so much for stopping by!
Don't forget, you can follow me on Instagram, Twitter and Pinterest to see what I'm up to.

Friday, July 17, 2020

Mermaid Card Collection Day 3 - Let’s Shellabrate

 Hello there! I’m back with the third and final day of my Mermaid Card Collection and today I have another slimline card featuring one of the mermaids from the Under the Sea stamp set.
 To create my card, I stamped several images from the Under the Sea set, colored them using Copic markers and die cut them out using the Under the Sea dies. For my sentiment, I used the Let’s Shellebrate from the Mermaid Song stamp set and dies.
 For my background, I used the Small Slimline with Lift the Flaps die and white card stock and then blended on some tumbled glass and broken china distress oxide ink using a wave stencil. I also used some kraft card stock for my sandy ocean bottom which I die cut using Stitched Hillside Borders die and blended on some vintage photo distress oxide ink around the edges. 
 To finish off my card, I added small pearls to the center of the clam shell (see photo above), some sequins, some Glossy Accents on the stamped bubbles in the background and some Wink of Stella glitter pen on the mermaid, the shell she’s holding and the clam shell with pearls.

Thursday, July 16, 2020

Mermaid Card Collection Day 2 - Swimming By

 Hello! I’m here with Day 2 of my Mermaid Card Collection and today I have a fun shaker card that I created using the Honey Bee stamp set, Swimming By.
To create my card I started out by stamping some of the fun images from the Swimming By stamp set and coloring them using Copic markers then die cutting them out using the Swimming By dies. Next I die cut two white card stock panels using the Outside In Stitched Rectangle dies. On one of the panels I used the Small Stitched Circle dies for the window to my shaker and on the other panel I used a wave stencil and some distress oxide inks (tumbled glass & mermaid lagoon) to blend my ocean view. 
Once my ink blending was dry, I used my Misti tool and stamped part of my sentiment and some bubble images. After that I positioned two of the seaweed images on my ink blended panel and glued them in place. I used my anti-static tool on my ink blended panel and in the middle added some iridescent sequins, blue sequins and glitter for my shaker bits.
For my top panel with circle cut out, on the back side I added acetate for the window and added foam tape and adhered it to my ink blended panel to create my shaker (see photo below). Then I adhered another seaweed image, the turtle, my die cut sentiment and my mermaid which I popped up with foam tape. In the photo above you can see how I glued a small shell in the mermaids hand and how I used a Wink of Stella glitter pen on the mermaids tail and on the turtle.
Thanks for stopping by! You can view this mermaid shaker card in action over on my Instagram account by clicking here.