Pages

Thursday, July 27, 2017

Swinging by - (CTD453)

Hello there!  I'm late with posting my Color Throwdown Challenge card by a day but better late than never.  It seems like summer is speeding by and with my youngest son home all day and five members of our family coming and going I'm constantly cleaning, cooking, doing some school work with my youngest or trying to plan something fun for all of us to do before the summer is over.  It's hard for me to believe that within a few short week's that our daughter is heading back up to college for her junior year and that our youngest will be starting his last year in elementary school.  So I haven't had a lot of time for my card making like I'd like to, but it will still be here when I'm ready.
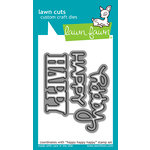
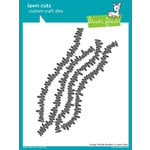
For my CTD card, I used the adorable new Love Ya' Bunches stamp set and die set which was a collaboration between Lawn Fawn and Ellen Hutson.  This set is so fun to work with and I was very impressed by the packaging from Ellen Hutson, the stamp set and dies came in a clear storage envelope just like the way I store my stamps.  It was very nice.  To create my card, I started out with a white card base and then using a LF Outside In Stitched Rectangle Stackables die, die cut a piece of watercolor paper.  I used some mustard seed and wild honey distress inks on my watercolored panel and added some water drops with a paint brush which I blotted with a paper towel.  Next I used the LF Grassy Hillside Borders die for along the bottom and the LF stamp set and Happy, Happy, Happy along with the dies for a portion of my sentiment.  I die cut two of the happy die cuts and glued them together for added dimension and lined up the other portion of my sentiment on my Misti tool to stamp them.  Once that was done, I added my monkeys which I had stamped and colored using Copic markers, then die cut.  I popped up the lowest swinging monkey with foam tape and to finish off my card I added a few black enamel dots.
For more inspiration, check out the design teams' blog links below OR you can go to the Color Throwdown blog for details on how to play along and you can see all the sample entries in one location.

Amy Rohl
Amy Rysavy
Wanda Cullen
Tracey McNeely - July Guest Designer

Wednesday, July 19, 2017

Glass Dome - (CTD452)

Hello there!  It's time for this week's Color Throwdown Challenge!
I saw the colors and inspiration photo for this week's challenge and I immediately thought of the new Flora & Fauna stamp set that I recently purchased, Glass Dome.  It has this illustrated little house along with other floral elements within the stamp set and I thought it would be fun to create a few cards using it.
For both cards, I used the Flora & Fauna stamp sets, Glass Dome and Oh Hello Friend and did some masking.  I stamped out the images I wanted to use onto copy paper, then cut them out and applied temporary adhesive to the back so I can used them again and again.  For my first card which is the first photo on top, I stamped the glass dome in black ink onto a white card base along with the house.  Then I placed a mask over the house and stamped the two different stem images in new leaf and hawaiian shores ink.  Once that was done, I removed my mask and roughly colored the house, and a grassy hill for my house to rest upon, using Copic markers.  Next I added a mask over the entire dome and stamped my flowers and more stem images along with my sentiment.  After that, I embossed a scalloped frame around my entire scene and added butterfly to the upper right corner.  As a finishing touch I added some iridescent sequins and some Wink of Stella glitter pen to the butterfly and black & white flowers.
For my second card, I embossed a stitched rectangle frame on a white card base and stamped the same little house again, then masked over it and stamped my stems just like I did with my first card.  Then I removed the mask and stamped the stone walkway and colored the house and a hillside using Copic markers.  Next I used my Misti tool and the flowers and stem images from the Oh Hello Friend set and stamped the corner of my rectangle frame.  I stamped all of the images within the rectangle in color and any outside the rectangle in black.  I did this by inking up each image in the color (masking some of the flowers as I went) I wanted and masking out the area outside my rectangle and then stamping and then doing the opposite by masking the inside of the rectangle to stamp the same images in black ink for outside of the rectangle.  Once I was done doing that, I used a fine point black pen and added some line detail.  I added a butterfly I stamped and cut out near the flower images and added some sequins and Icicle Stickles to the butterfly and centers of the flowers.
For more inspiration, check out the design teams' blog links below OR you can go to the Color Throwdown blog for details on how to play along and you can see all the sample entries in one location.

Amy Rohl
Amy Rysavy
Wanda Cullen
Tracey McNeely - July Guest Designer

Thursday, July 13, 2017

Sunshine - Sunny Studio Guest Designer

Hi there!  I've got some exciting news to share, I was asked to do a guest designer spot over on the Sunny Studio Stamps blog today.
I created two cards using the adorable Sunny Studio's stamp set Sunny Sentiments along with the coordinating Sunshine Word Die and Sun Ray Die sets.
For my first card, I stamped one of the cute sunshine images from the set along with three of the cloud images onto white cardstock and colored them using Copic markers then cut them out.  Next I did some ink blending onto a panel of white cardstock using tumbled glass, mustard seed and spiced marmalade distress inks.  After that, I blended the same yellow distress inks onto a piece of yellow cardstock and used the Sun Ray Die to die cut them out.  I adhere my die cut sun rays onto my ink blended panel, making sure to leave room for my stamped sentiment.  I added my clouds and sunshine images next, popping up the sun and one of the clouds using foam tape and then stamped my sentiment along with three yellow stars.  I used the Sunshine Word Die and die cut that from black cardstock and adhered that below my stamped sentiment.  I added a vertical strip of yellow cardstock to a white card base and added my decorated cardstock panel using foam tape. As a final touch, I used some icicle Stickles to the three stamped stars and some Wink of Stella glitter pen to my sun rays.
For my second card, I used a piece of watercolor paper and watercolored some yellow and orange for the area I knew I wanted my sunshine and some grays and dots of aqua for where I wanted my clouds and rain drops.  I stamped the same sunshine and cloud images on to white cardstock again, coloring them with Copic markers and cutting them out.  Then on a scrap piece of paper, I die cut one of the sun rays using the  Sun Ray Dies and used it as a stencil, using mustard seed and marmalade distress inks, over the area I knew I was going to place my stamped sunshine image.  Next I used the same yellow distress inks onto a piece of yellow cardstock and die cut my Sunshine Word and adhered it to my panel, then stamped my sentiment and rain drops and adhered my clouds and sunshine, popping up the sun and one cloud with foam tape.  I used a white card base with a strip of yellow cardstock along the bottom and adhered my panel using foam tape.  For some added detail, I used some Glossy Accents on the rain drops and did dots of yellow Stickles on the sun rays.
Thanks so much for stopping by!

Wednesday, July 12, 2017

Oh Hello Friend - (CTD451)

Hello there, crafty friends!  It's Wednesday and time for a new Color Throwdown Challenge.  We have some sweet summertime colors to create with for this week and we hope you'll join in and play along.
I'm sharing a collection of three projects for my post today all using the colors for this week's Color Throwdown.  I used a new stamp set, Oh Hello Friend, by a company called Flora and Fauna.  I've been admiring their products and have wanted to try them out for some time and I'm so glad I did.  The images are whimsical and fun and the stamps stamp out fantastic.  I  think if I were to create a stamp line, the stamps from Flora and Fauna would be what I would imagine.  I really had so much fun making the cards and tag I'm sharing today.
For my first card, I went with a clean and simple look using three of the flower images and two leaf images from the Oh Hello Friend set to create a thank you card.  I started out with a white card base and then using a separate piece of white cardstock I die cut a circle from it.  Then using my die cut piece, I lined it up on my card front and traced the circle opening lightly with a pencil so that I would know where to stamp my images.  I stamped my flowers in raspberry fizz, hibiscus burst and autumn rose ink and then stamped my greenery in simply chartreuse and limeade ice ink.  To give some of the images a solid color of ink, I took the coordinating stamp and flipped it over on my acrylic block and stamped with the backside of the stamp, stamping off with the same colors I used to stamp the outline of each image.  Next I used my Misti tool to line up and stamp just the friend portion of the Oh Hello Friend sentiment from the set.  Once my images where stamped, I added foam tape to my die cut circle panel and  adhered it to my stamped card front.  Then I heat embossed the second part of my sentiment on a black cardstock banner and added a butterfly which I stamped and fussy cut out.  As a final detail I added some pink iridescent and silver sequins and some Icicle Stickles.
For my second card, I stamped my sentiment in the center of a rectangle and then stamped my floral images all around it using the same color inks as above.  I also used some watered down pink watercolor to add some splatters of color.  Once that was done I used the Inside Out Stitched Rectangle dies and die cut the outer edge with one rectangle die and around my sentiment with a smaller one.  I adhered the center with my sentiment directly to a piece of raspberry fizz cardstock and I added foam tape to the frame around it.  I added another stamped butterfly and added a bunch of glitter to the flowers using Icicle Stickles, Wink of Stella glitter pen and pink and silver sequins.
For my last project, I created a coordinating birthday tag.  I used the same images and inks as above but for my sentiment I used the birthday wishes from the F&F stamp set, Glass Dome.  I used a PTI tag that I die cut and tied on some ribbon and bakers twine.  These pictures of my projects don't do them justice because they really sparkle in the light with all of the Wink of Stella glitter and dots of icicle Stickles.
For more inspiration, check out the design teams' blog links below OR you can go to the Color Throwdown blog for details on how to play along and you can see all the sample entries in one location.

Amy Rohl
Amy Rysavy
Wanda Cullen
Tracey McNeely - July Guest Designer

Thursday, July 6, 2017

My Favorite Things Guest Designer

Hello there, crafty friends!  
Today I'm happy to be sharing cards I created for my second post as a My Favorite Things Guest Designer.
For my first card, I used the adorable new stamp set, Fairy Happy to create a birthday shaker card.  I started out by stamping one of the sweet fairies from the set along with several of the little accent images like the flowers, butterflies and bees and colored them with Copic markers.  Next I did my die cutting using the Fairy Happy Die-namics.  After that, I used just the bee and the loopy trail stamps to stamp a piece of lime green cardstock for my background and die cut a square from the top portion of my card.  Then I used the Stitched Mini Scallop Square Die-namics to create a frame to go around my die cut window.  I used a piece of acetate and craft foam to create my shaker and filled the inside with the flowers, butterflies, hearts and bee images along with some sequins, beads and glitter.  To finish off my card, I added the fairy with foam tape, the tall flowers in the lower right corner and I stamped my sentiment onto a Stitched Fishtail Sentiment Strip and adhered it to the lower left of my card.  I also used a Wink of Stella glitter pen and went over the flowers and the fairies wings and dress.
For my second card, I used the Color Drops stamp set and Color Drops Die-namics to create what I think looks like a mod looking thank you card.  I used a white piece of cardstock, cut to card front size, and used the Stitched Star Grid Die-namics just along the left side.  Then I die cut several of the Color Drops in pink, orange and dark purple along with three die cut thanks from the Thanks & Hello Die-namics which I layered and glued together.  I adhered my die cut Color Drops along the stitched lines and then used the Color Drops stamp set and stamped dots in between each drop.  Toward the bottom of my card, I added a horizontal strip of dark purple cardstock with a thin strip of pink and glued on my die cut thanks.  As a finishing touch, I added matching sequins on a few of the stamped circles.
For my third and final card, I used the fun stamp set, Beary Big Adventure.  The first thing I did was to stamp some of the images from the set and color them with Copic markers, then die cut them using the coordinating Beary Big Adventure Die-namics.  Next I created my own designer paper look for my background by using the Chevron Grid Stencil onto pale blue cardstock and stormy sky distress ink. Then I stamped the two different sized flowers from the stamp set, coloring in the centers with white gel pen.  I used one of my favorite dies, the Square Peek-a-Boo Window Die-namics and die cut my stenciled piece.  Then using a separate piece of white cardstock, cut smaller than my card front, I die cut a square opening toward the top and adhered my stenciled piece over top of it to create a window.  I also added a strip of dark blue cardstock along the bottom and a Stitched Fishtail Sentiment Strip with my stamped sentiment.  I backed the die cut window with dark blue cardstock and adhered the panel with foam tape then added all of my stamped images, popping up the bear.
Thanks so much for stopping by!

Wednesday, July 5, 2017

Celebrate Today - (CTD450)

Happy Wednesday!  It's time for this week's Color Throwdown Challenge!  Before I get to my card, I'd like to welcome this month's CTD Guest Designer, Tracey McNeely .
For my card, I used the Papertrey Ink stamp set, Quilted:Summer along with the coordinating dies to create a birthday card for my mom's birthday which is today.  I started out with a white card base, then added a piece of pacific blue cardstock along the bottom which I had embossed using the PTI plaid impressions plate.  Next I stamped my sentiment from the PTI Think Big Favorites #3 onto a MFT Essential Fishtail Sentiment Strip and adhered that to the bottom of my card.  After that, I added a MFT Stitched Mini Scallop Square with a red piece of cardstock in the center.  Then I added my die cut and stamped quilt pieces which I stamped in red, daffodil, and pacific blue and popped up my quilt piece with foam tape.  For a little detail, I die cut some PTI flower buttons and strung a piece of red and white bakers twine through the center and added that to the center of my quilted piece.
For more inspiration, check out the design teams' blog links below OR you can go to the Color Throwdown blog for details on how to play along and you can see all the sample entries in one location.

Amy Rohl
Amy Rysavy
Wanda Cullen
Tracey McNeely - July Guest Designer


Thanks so much for stopping by!
Don't forget, you can follow me on InstagramTwitter and Pinterest to see what I'm up to.